1.
What is AXS App?
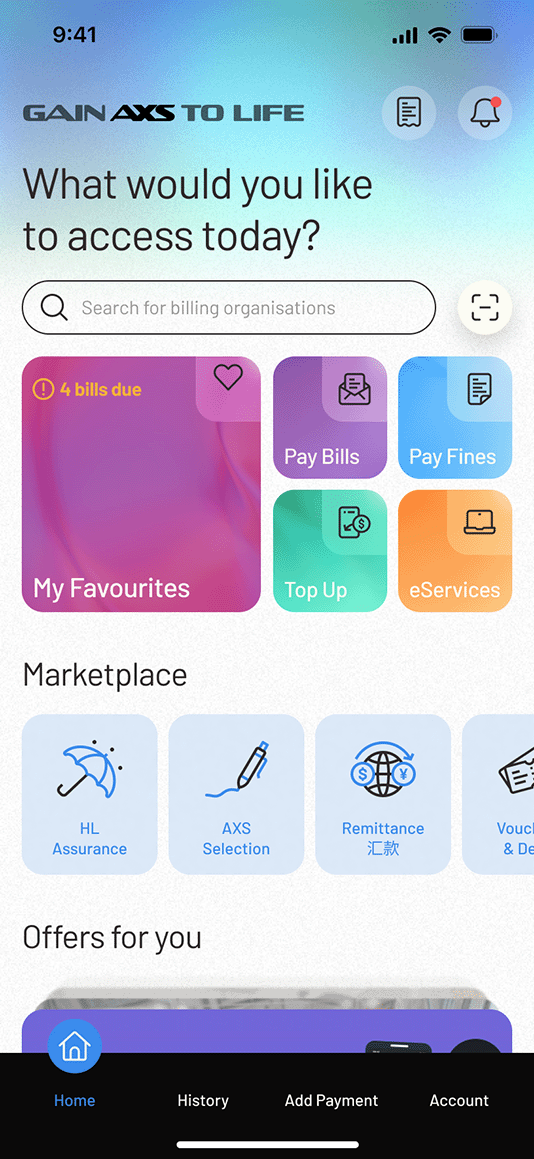
AXS App is a mobile application that allows you to make payments on your mobile devices with internet connection. It is an extension of AXS Network that caters to users who are constantly on-the-go.
2.
Do I need to pay to use the services on AXS app?
No, the services provided are FREE except for Condo/Bldg (MCST).
There is a service fee of $0.50 for all Condo/Bldg (MCST) payments. Service fee waiver promotion may apply time to time. Do check the service page to find out more.
3.
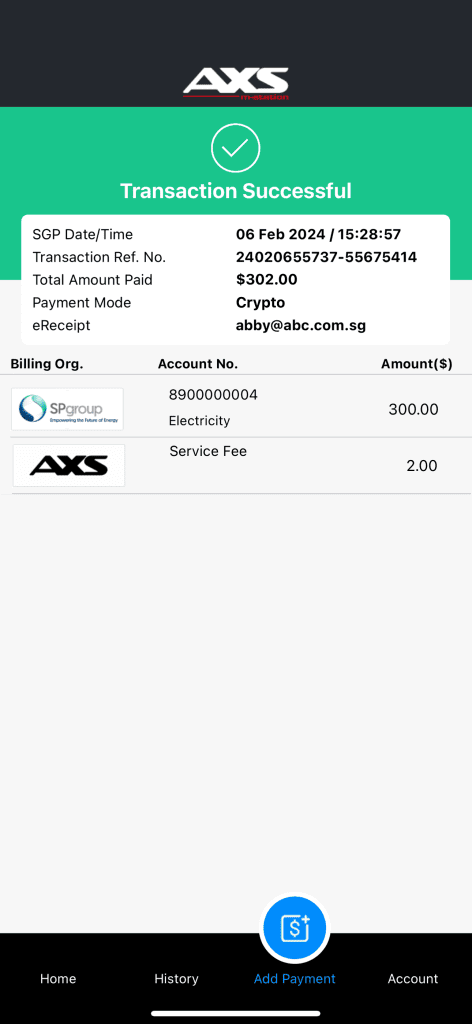
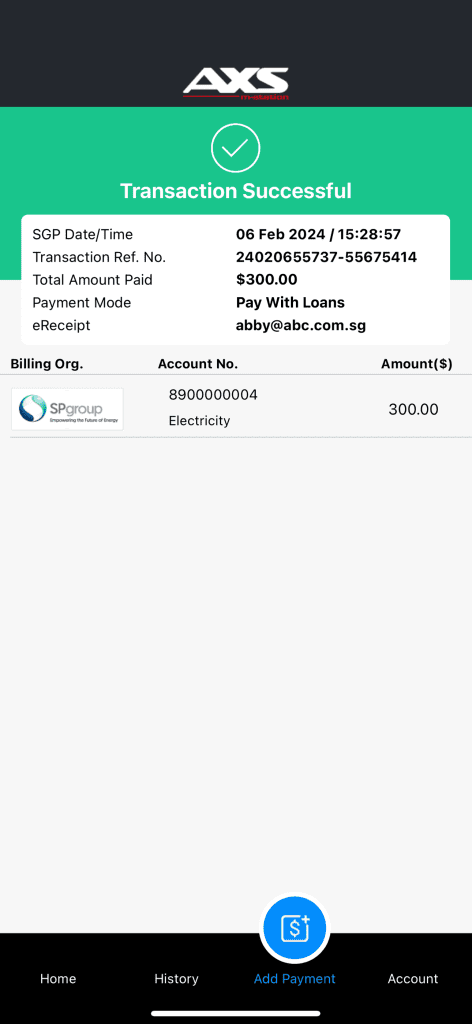
Will I receive a receipt after I complete my transaction?
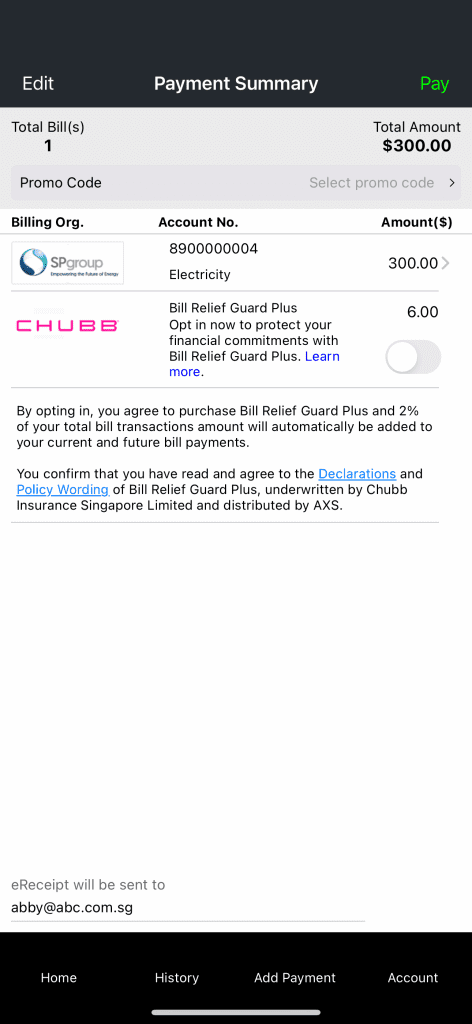
Yes, you can choose to receive an eReceipt of your successful transaction by entering your email address at the payment summary page, or set up your email address at “Account” > “Settings”.
4.
Which country is the AXS app available in?
The AXS app is currently available for download in Singapore, Malaysia* and Indonesia*.
*Please note that only Singapore-issued debit and credit card can be used to make payment.
5.
Which OS versions is the app compatible with
The AXS app is compatible with the following OS versions:
| Devices |
Compatible OS |
| Apple iOS smart phone |
iOS 12 and above |
| Apple iOS tablet |
iOS 12 and above |
| Android smart phone |
Android 7.0 (Nougat) and above |
| Android tablet |
Android 7.0 (Nougat) and above |
| Huawei smart phone |
HarmonyOS 1 and above |
| Huawei tablet |
HarmonyOS 1 and above |
6.
What is "My Favourites"?
“My Favourites” is a function only available on AXS app, designed for storing and accessing your payment information securely.
To access this function, an account is required to ensure the protection of your payment information. In addition, all payment information is stored locally on the device which AXS app is installed.
7.
For existing passcode users. What is the length of the passcode?
You can create a passcode with a length between 6 to 12 alphanumeric characters.
8.
For existing passcode users. What should I do if I have forgotten my passcode?
If you have forgotten your passcode, you will need to reset and create a new passcode by selecting “Account” > “Settings” > “Passcode” (turn off your passcode function and then turn it on again to reset your passcode).
* Do note that all payment information stored under “My Favourites” and “History” will be cleared and cannot be retrieved.
9.
For existing passcode users. What will happen if I turn off the passcode function?
If you turn off the passcode function, all your payment information stored under “My Favourites”, “History ” and information under AXS Receive will be cleared and cannot be retrieved. In addition, some features (e.g. Touch ID) will be disabled.
10.
Can I retrieve my payment information under "My Favourites" and "History." if I delete AXS app?
For existing passcode users:
If you delete AXS app, all information stored under “My Favourites” and “History” locally will be deleted and irretrievable.
Customers are encouraged to backup app data to an external backup device or cloud services to avoid app or data loss.
Learn how to back up your app data here
For Social Sign On users:
You don’t need to worry as your data will be automatically restored when you register or log in again using the same social account.
11.
Is there any method that I can transfer the payment information under "My Favourites" and "History" to another device before I turn off the passcode function?
For existing passcode users:
No, you will not be able to. All your payment information will be cleared and cannot be retrieved if the passcode function is turned off.
For Social Sign On users:
Yes, you just need to sign up for an account AXS App and your details will be saved. When you use a different device, log in with the same details and all your payment details will be there.
12.
Will I be able to transfer the payment information from Favourites or History to a different device or view them on another device using the same account?
For existing passcode users:
You will not be able to view or transfer payment information to a different device as the payment information is stored locally on one specific device.
For Social Sign On users:
Yes, you just need to sign up for an account on m-Station and your details will be saved. When you use a different device, log in with the same details and all your payment details will be there.
13.
What is the AXS Rewards Programme?
The AXS Rewards Programme allows you to earn AXS Coins when you make payments through AXS mobile app. These coins can be redeemed for vouchers, discounts, and other exciting rewards.
14.
How do I earn AXS Coins?
You’ll automatically earn AXS Coins whenever you pay bills on the AXS app:
• 10 Coins for every unique bill payment
• 15 Coins for every recurring bill payment (after the first setup)
• Bonus: 30 Coins when you pay 3 bills
To start earning AXS Coins, make sure you’re on the latest AXS app version 9.0 or above, and logged in via Google, Apple ID, or Facebook.
15.
Do I need an account to earn coins?
Yes. To earn and accumulate AXS Coins, you must be logged in to the AXS app using an account (via Google, Apple ID, or Facebook).
Guest users can still pay bills, but they will not earn Coins.
16.
How long are my coins valid?
Coins are valid for 3 years from the month they are issued. For example, coins earned in January 2025 will expire in February 2028.
17.
How can I check my coin balance?
You can view your coin balance and history in the My Rewards section of the mobile app.
18.
How do I redeem my coins?
Go to My Rewards in the mobile app. Browse the Rewards Catalogue for available vouchers. Select a reward and redeem using your coins.
19.
What types of rewards can I redeem?
We have a multitude of rewards to redeem! Rewards include, AXS Vouchers to offset bill payments, and merchant vouchers (coming soon) to use in participating stores or online.
20.
Can I use multiple vouchers in one transaction?
No. Only one voucher can be applied per transaction.
21.
Will I be notified about expiring coins or vouchers?
Yes. You’ll receive push notifications and email reminders before expiry.
22.
What happens if I close my account?
All unused coins and vouchers will be forfeited and cannot be reinstated.
23.
What if I didn’t receive my coins?
If your Coins seem to be missing, don’t worry — our team is here to help.
Simply use the Contact Us form in the app and we’ll assist with investigating what happened.
24.
Where can I find the full Terms & Conditions?
You can view the full T&Cs in the mobile app under My Rewards or click here (link-to-T&C).
25.
I’ve referred my friend to download the app but we did not get my referral reward. Why did we not receive it?
Referral rewards are only awarded after your friend completes their first unique bill payment of at least $5 on the AXS app.
Please also note that each user can receive rewards for up to 10 successful referrals.
26.
Can I transfer my coins to another user?
No. AXS Coins are non-transferable and can only be used within your own AXS account.
Coins are tied to the account you log in with (via your registered email and social login such as Google, Apple ID, or Facebook).
27.
Will my coins be available in my account if I change my device?
Yes. As long as you log in using the same account details (the same registered email and social login such as Google, Apple ID, or Facebook), your Coins and rewards will remain available.
28.
Do I earn coins for partial bill payments or split transactions?
No. Coins are awarded only for unique bill payments within each month.
29.
How do I use my AXS vouchers in the app?
Add a bill to your payment summary and select which AXS Voucher you would like to use to offset that bill.
30.
How do I use a reward that I’ve redeemed?
To get started, simply go to the redeemed reward in the app and refer to the “How it works” section for full instructions.
Depending on the reward, you may need to:
- Apply it directly as bill credit in the app
- Present a voucher to a merchant in person
- Copy a redemption code and enter it in the merchant’s app or website
31.
Can I use vouchers together with other discounts or promotions?
For AXS Vouchers, only one voucher can be used per transaction.
For merchant vouchers, please refer to the Terms and Conditions for the voucher.
32.
Are there limits on how many vouchers I can redeem?
Most rewards in the Rewards Catalogue can be redeemed with no limit.
However, campaign-specific rewards may have a redemption cap per user. Please refer to the reward details for any applicable limits.
33.
What if the app crashes during reward redemption?
If the redemption was successful, the reward will appear in My Vouchers. If not, your coins will remain in your wallet.
34.
Can I earn coins on all AXS channels?
Our rewards is currently only on AXS mobile app. We might expand this programme to other channels soon, so stay tuned!
35.
Do I need to verify my Singpass to use the rewards programme?
No. Singpass verification is not required.
However, you must be logged in with an AXS account via Google, Apple ID, or Facebook to access the Rewards Programme and earn Coins.
36.
What should I do if my voucher code doesn’t work at a merchant?
If you encounter an issue when using your voucher code, we recommend reaching out to the merchant directly first, as they may be able to assist with the redemption.
If the merchant is unable to resolve the issue, please contact the AXS team via the Contact Us form in the app — we’ll be happy to help investigate what happened.
37.
Can I have multiple accounts to earn more coins?
No. Each user may only earn AXS Coins from one registered account.
Creating duplicate accounts may result in the forfeiture of Coins and rewards.
38.
Do I earn coins for all payment methods?
In general, yes — AXS Coins are earned on bill payments made with all supported payment methods, unless stated otherwise.
AXS may adjust or restrict Coins eligibility for certain payment methods from time to time.
39.
Do I earn coins for all billing organisations?
In general, yes — AXS Coins are earned on payments to all supported billing organisations, unless stated otherwise.
AXS may adjust or restrict Coins eligibility for certain billing organisations from time to time.
40.
Are there any fees for using the rewards programme?
No. Participation is free.
42.
I am using eNETS DBS to make payment and am prompted to set up my d2pay. Do I have to do the set up every time?
No, this set up is a one-time process by the Bank and is only prompted if you are making payment using DBS d2pay (via eNETS) for the first time. During this setup process, you are required to designate a DBS Bank/POSB savings or current account as your default debiting account and the daily payment limit. The selected account and daily limit will be used for all your future DBS d2pay transactions.
After the initial set up, the amount will be deducted from your designated account and paid to AXS automatically.
Here is the process for the one-time DBS d2pay setup.
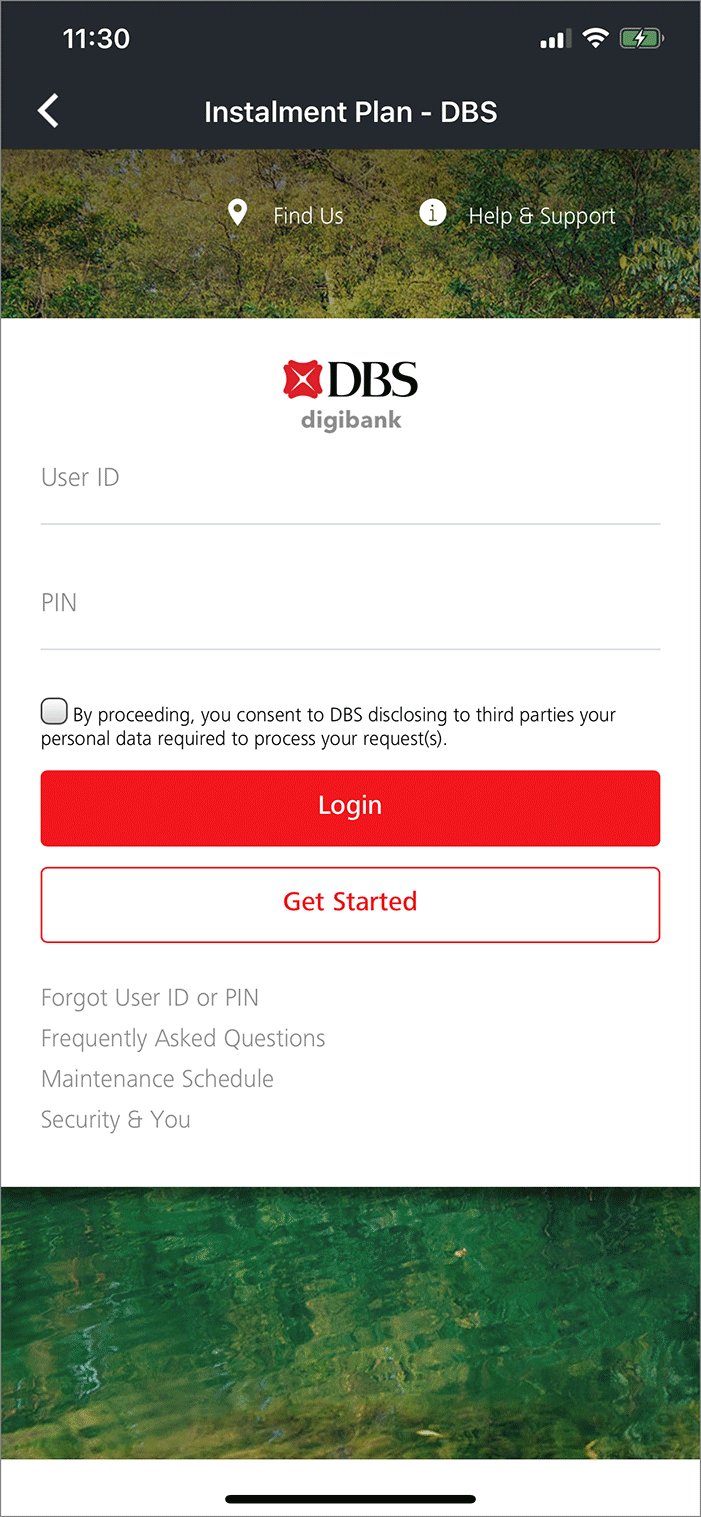
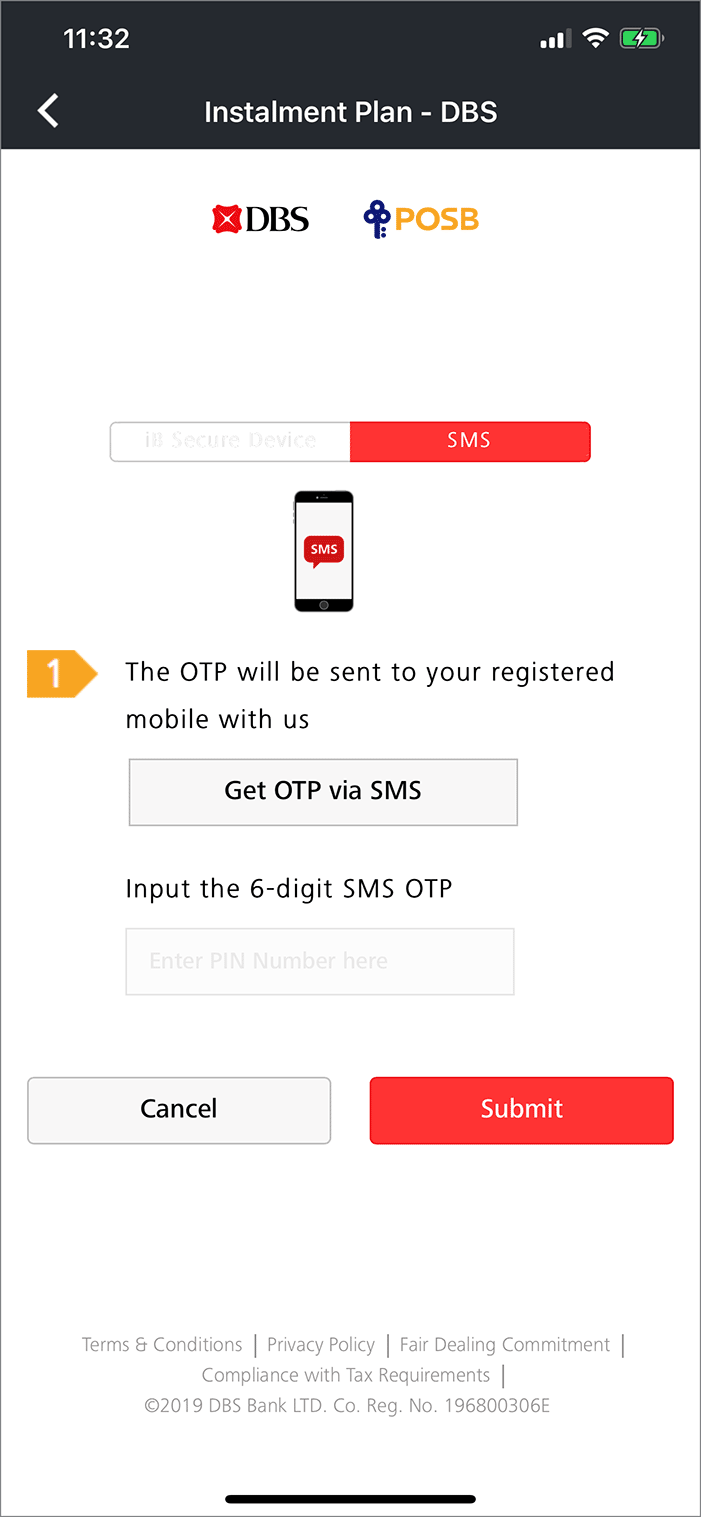
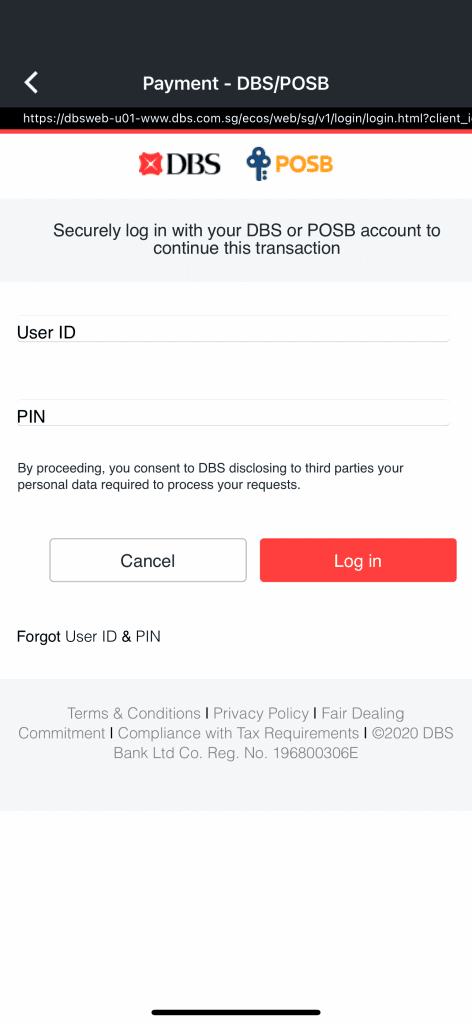
| 1. After choosing “DBS Bank Ltd” as the payment bank, you will be directed to DBS d2pay login screen.
Login with your digibank User ID and PIN. |
| 2. Follow the on-screen Transaction Signing instructions with your digibank Secure Device or digital token to authenticate. |
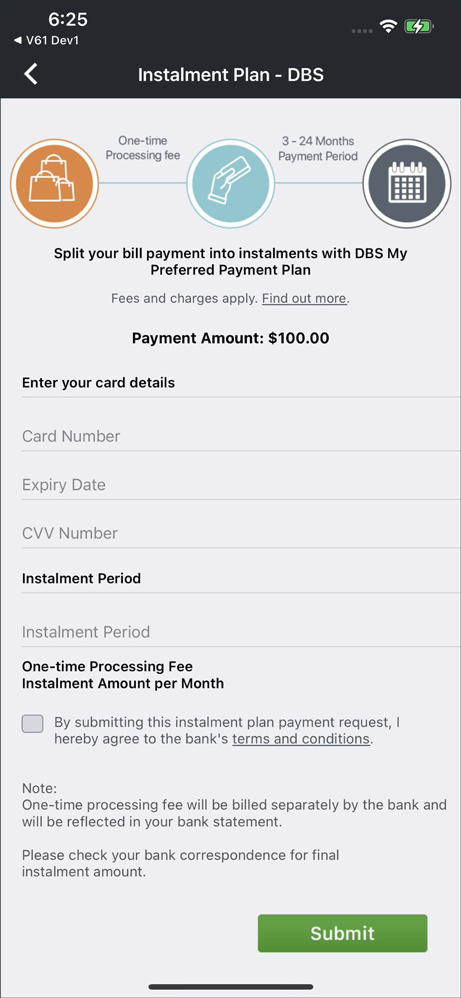
3. Set up your d2pay by
- designating the account type
- entering the account number
- (omit the dashes)
- setting d2pay daily limit
Select “Submit” to proceed with payment. |
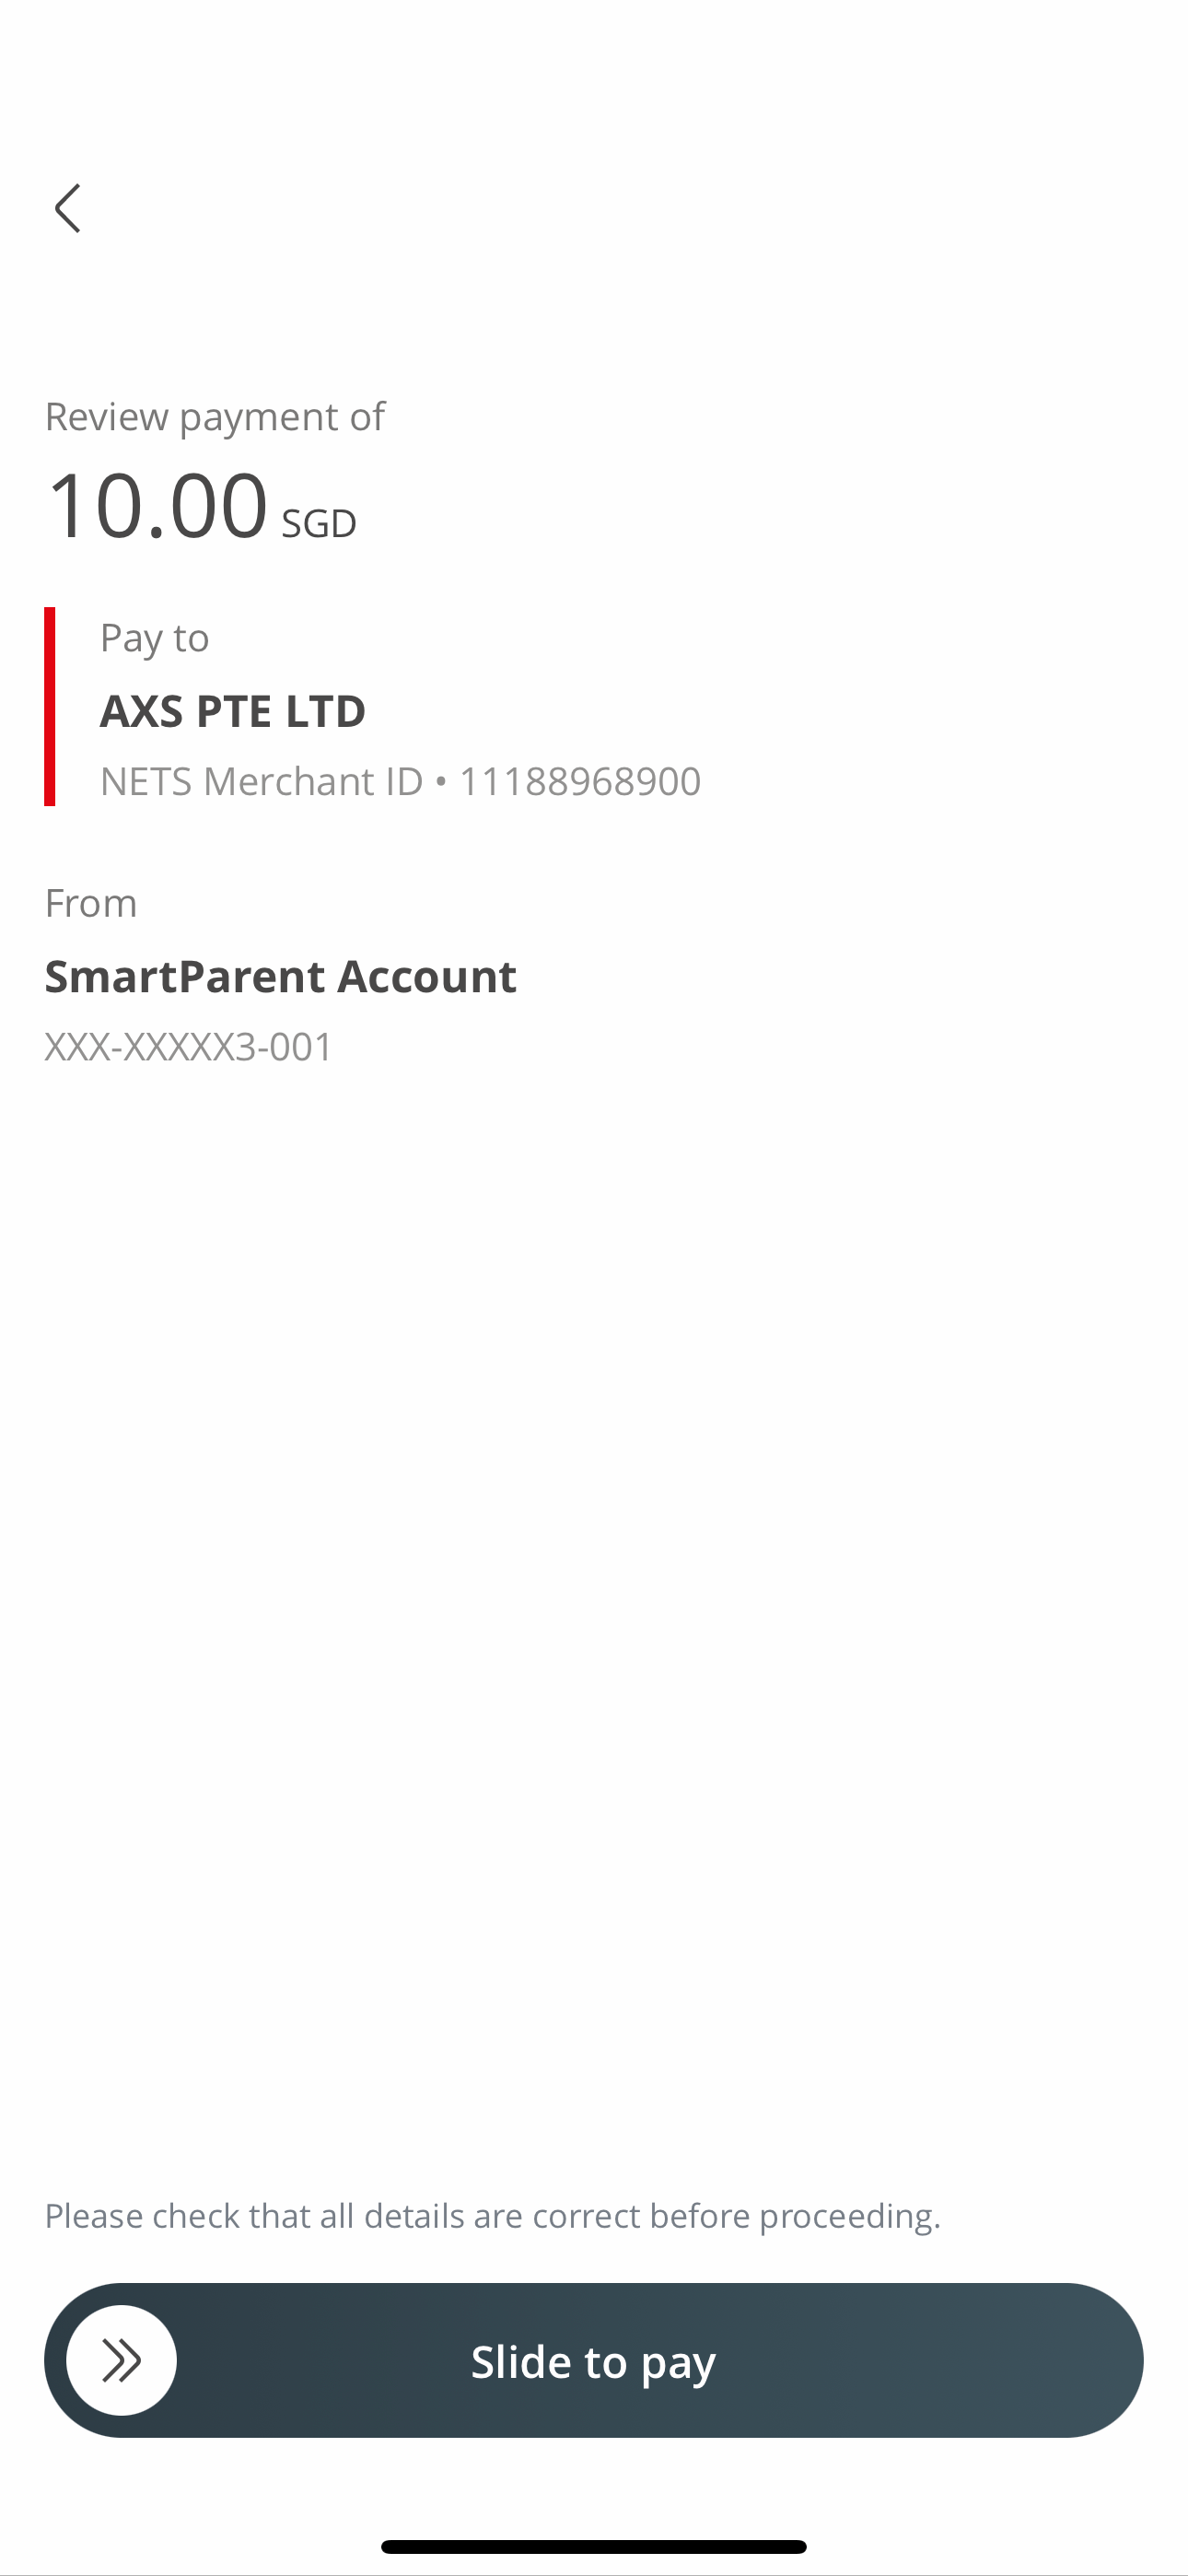
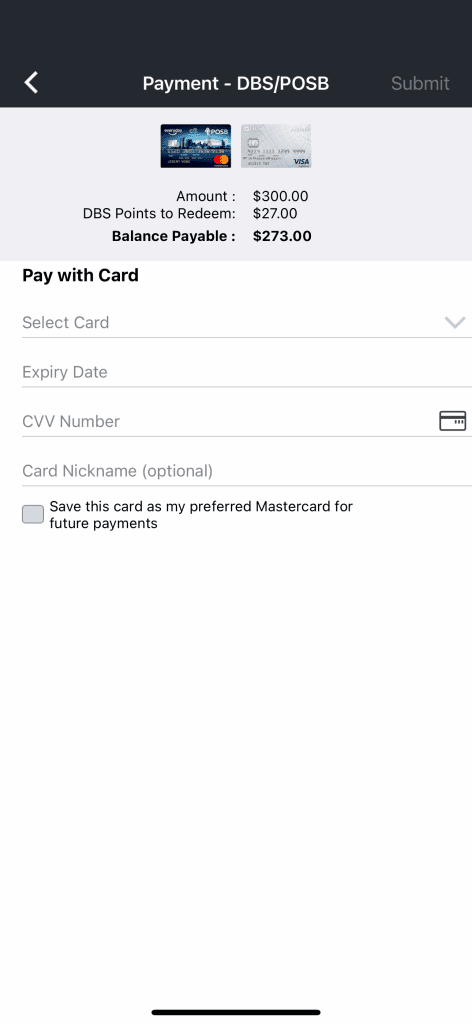
| 4. Check your payment details and proceed with payment. |
For more information on DBS d2pay, please refer here
43.
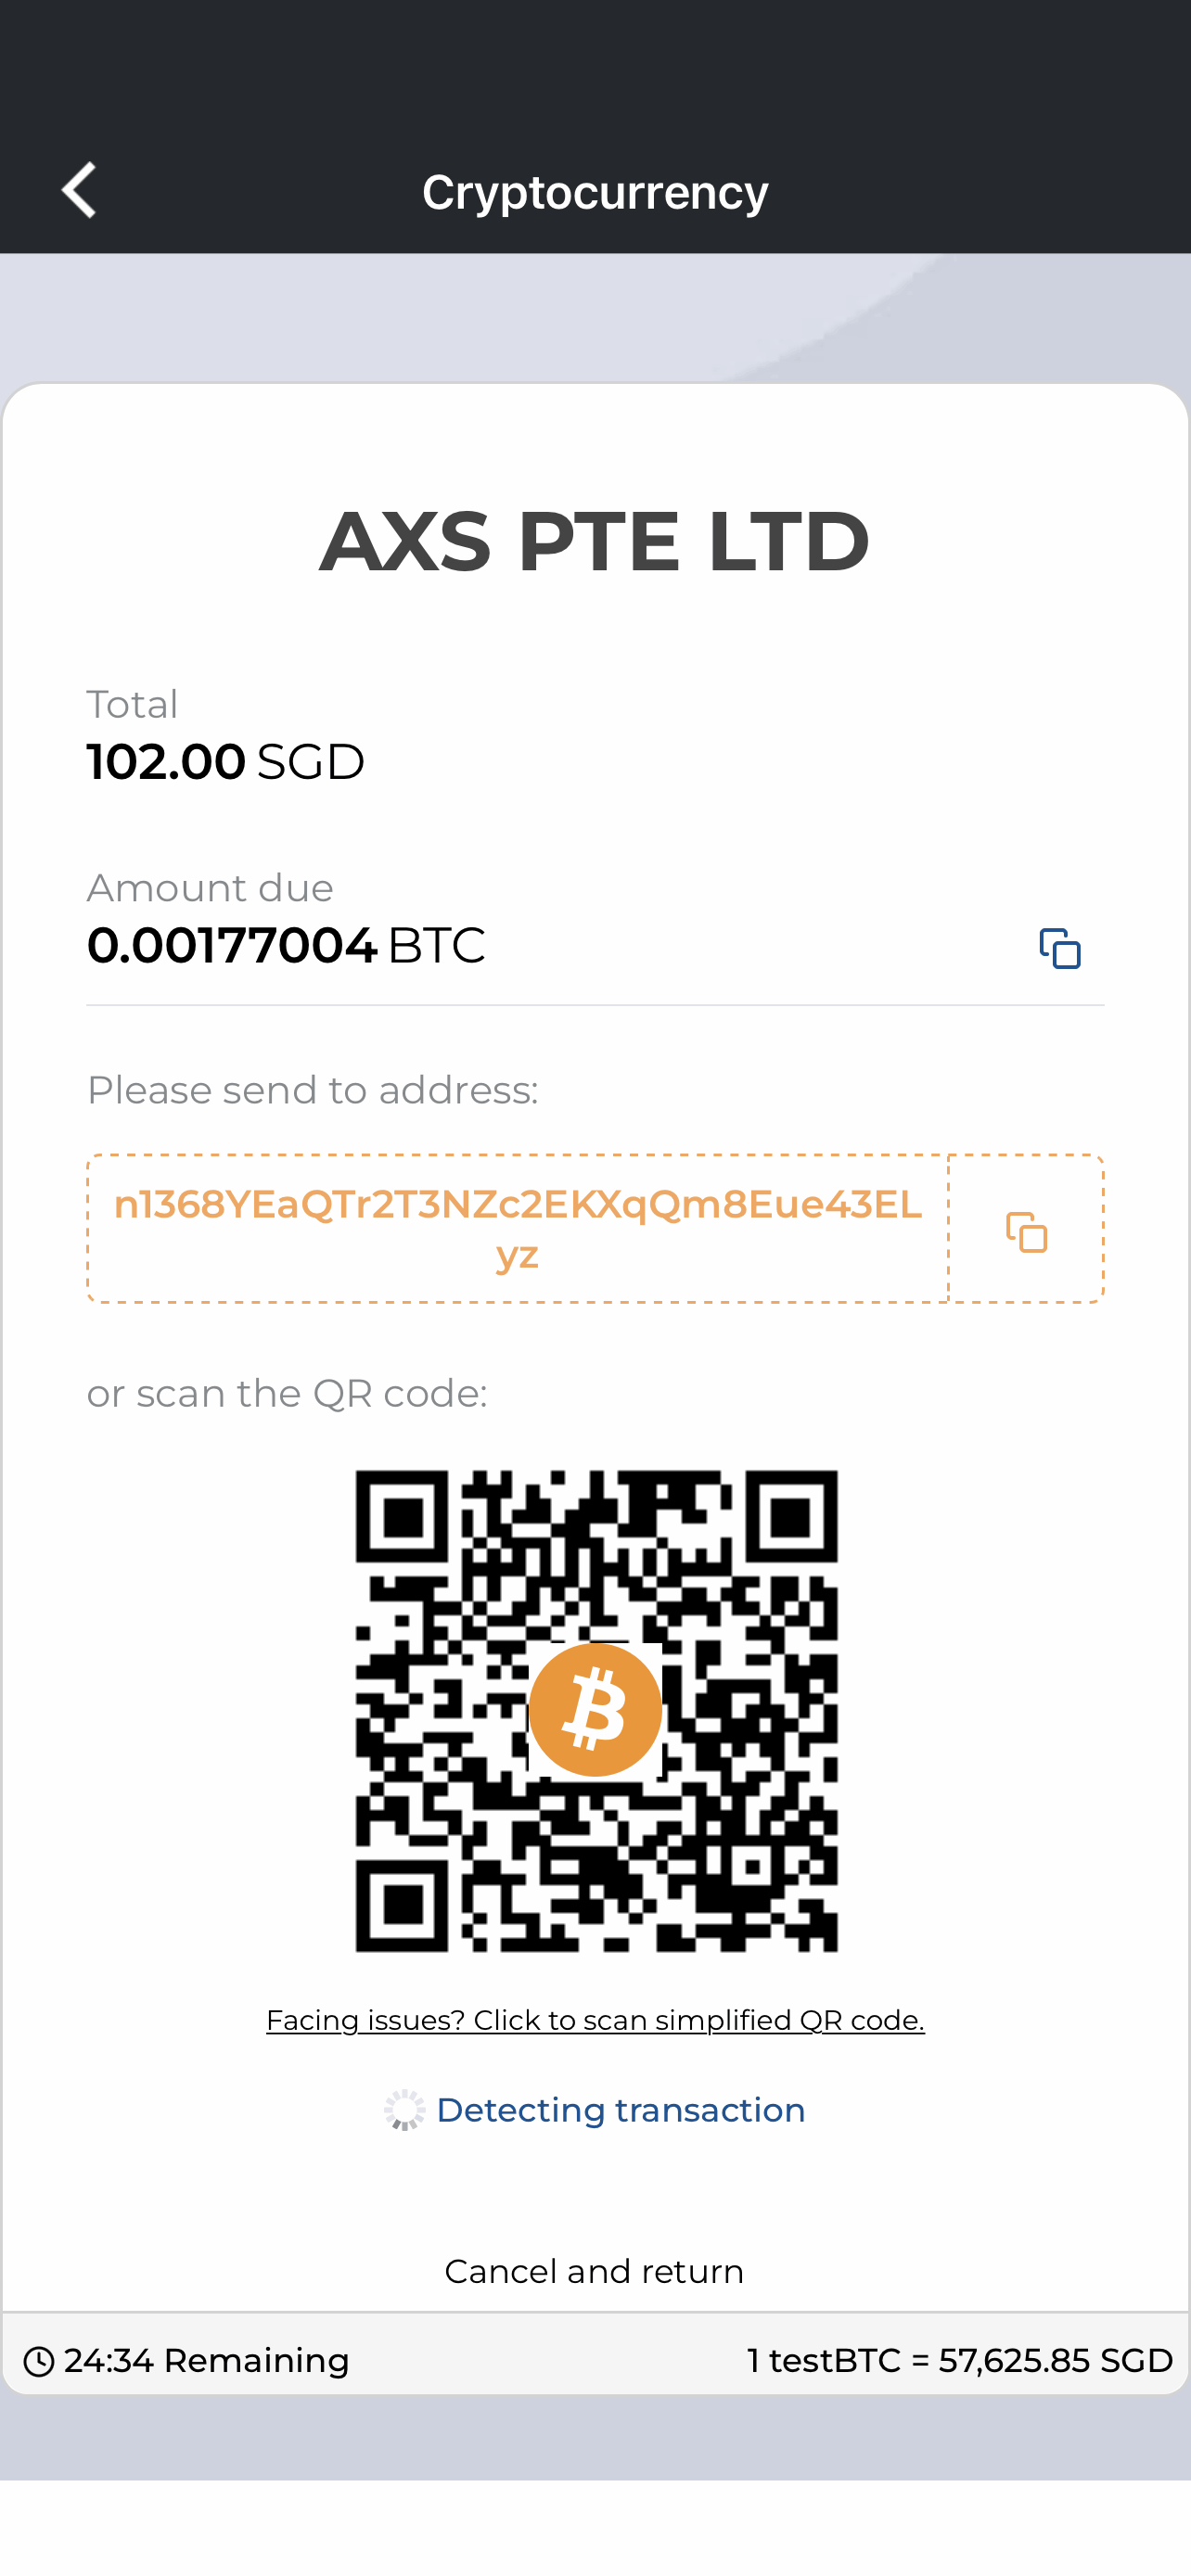
Is cryptocurrency still available as a payment mode?
Note: Effective November 15, 2025, Crypto payment mode will no longer be available on AXS App.
We continue to offer a wide range of secure and convenient payment options, including credit/debit cards, NETS, e-wallets, and PayNow.
Thank you for your understanding and continued support.
44.
Why is my NRIC required for certain payments?
Some billing organisations require NRIC information to verify your identity, especially if details are entered incorrectly or cannot be validated. This helps ensure that payments are processed securely and prevents unauthorised or incorrect transactions.
Your information is handled securely and used only for verification purposes, in accordance with applicable data protection regulations.
45.
What is the minimum and maximum amount I can pay through the AXS app in a single transaction?
Minimum Payment Amount:
- The minimum payment amount is determined by the respective service provider.
Maximum Payment Amounts by Payment Method:
- NETS Bank Card: The maximum is either the default limit set by your card-issuing bank or the daily transaction limit you’ve set, up to $20,000.
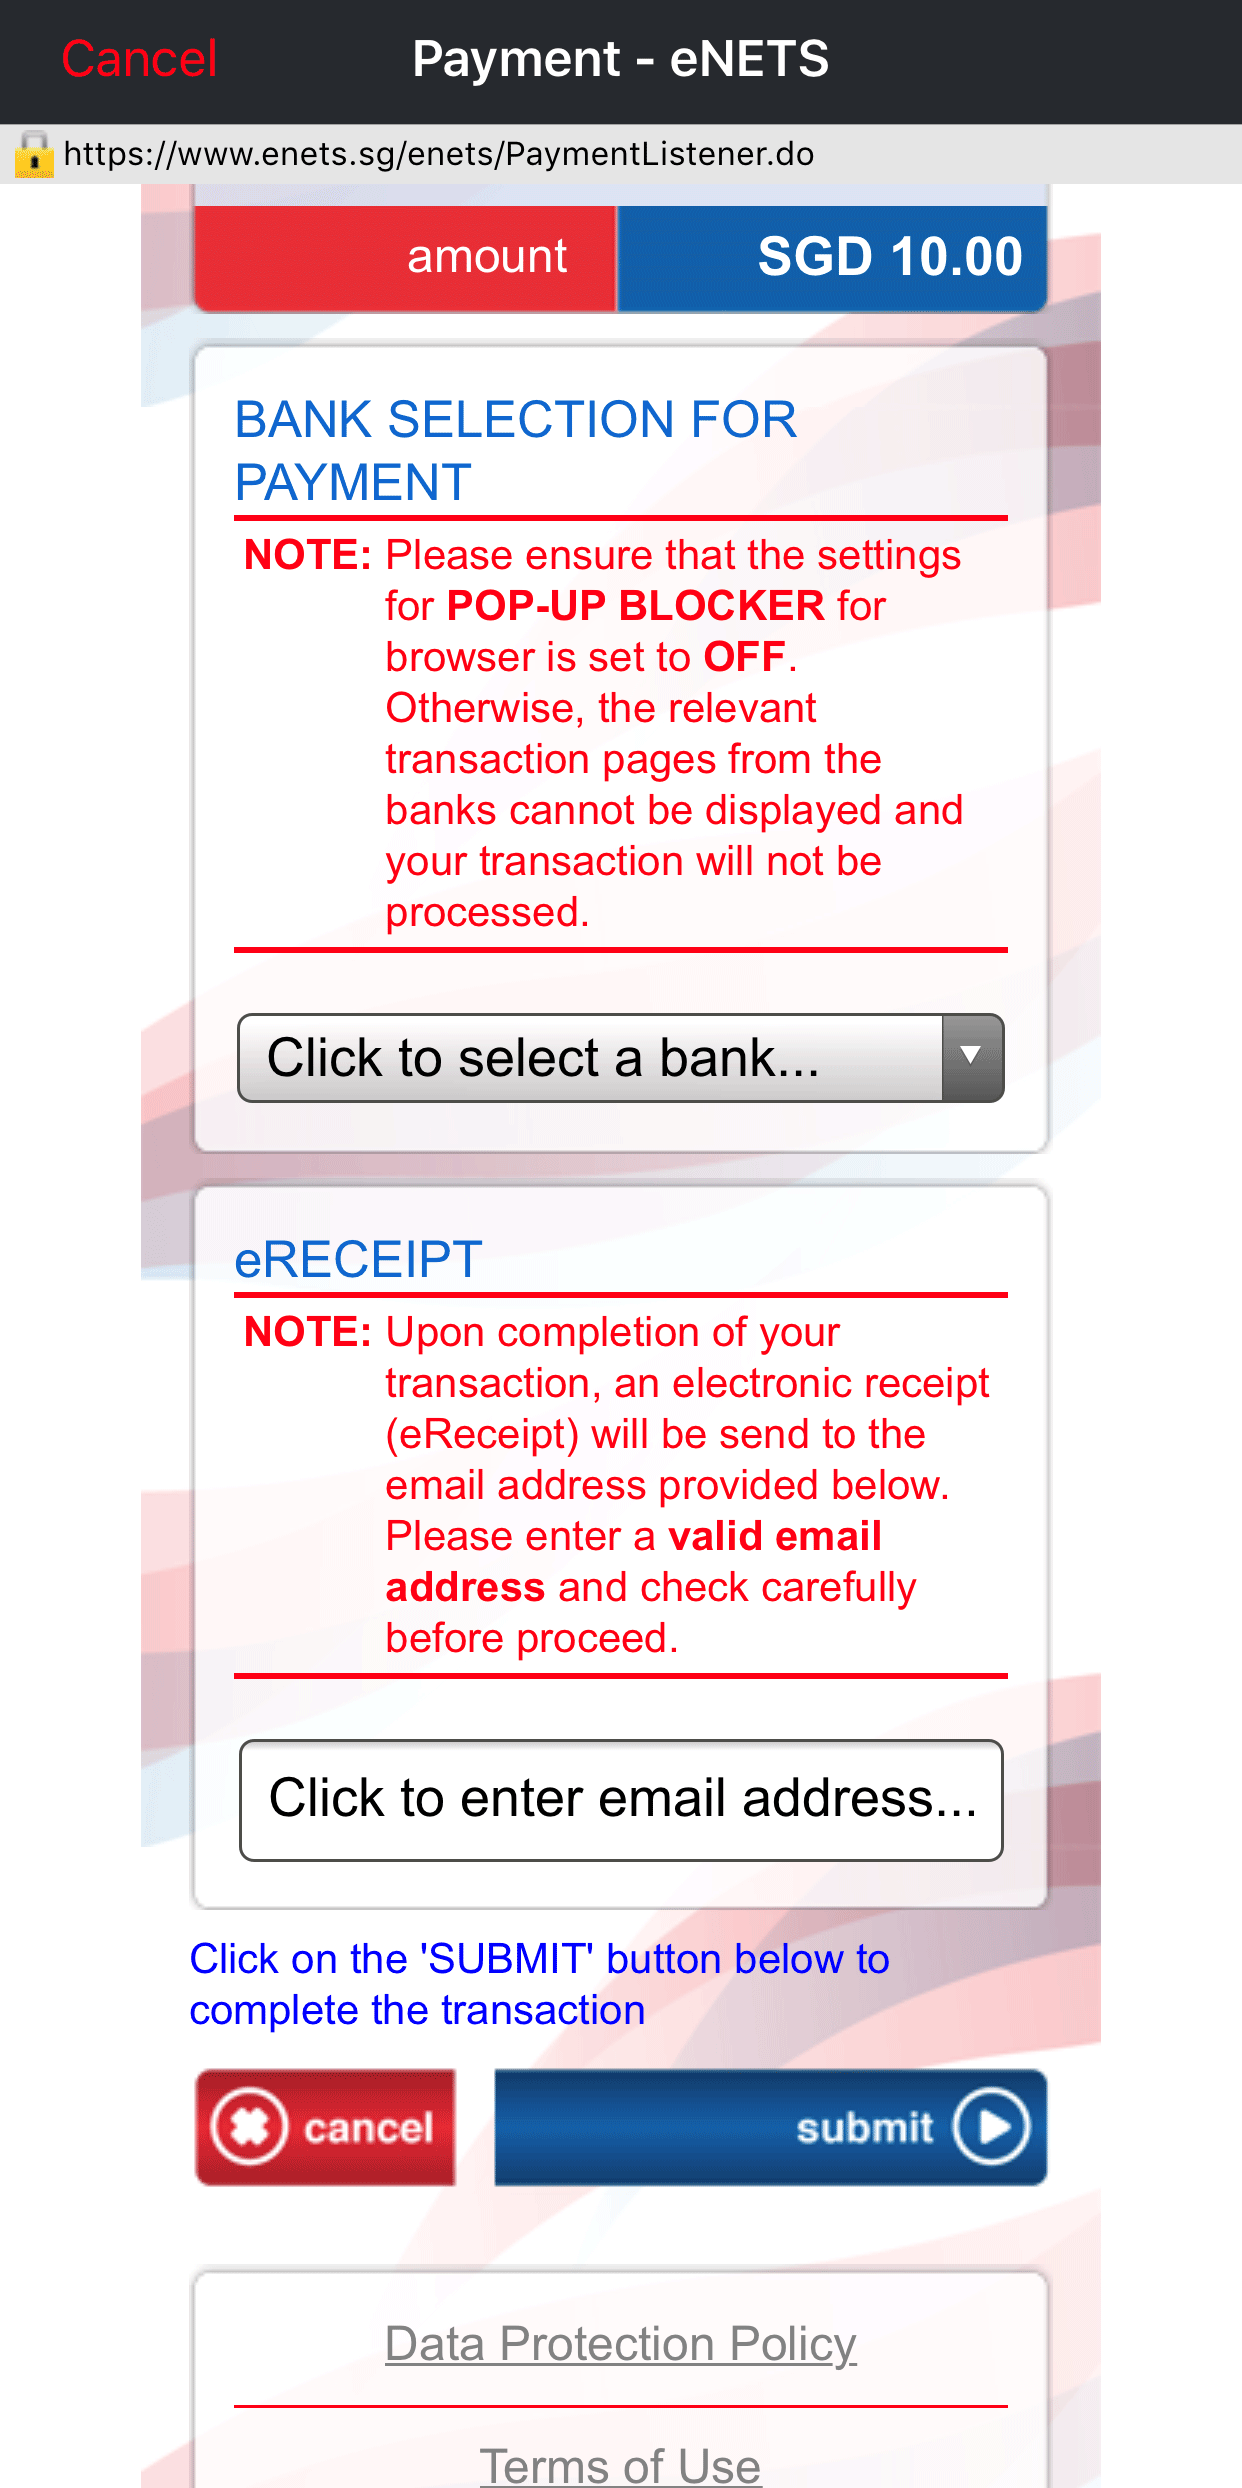
- eNETS: The maximum is either the default limit set by your card-issuing bank or your personal daily transaction limit, up to $20,000.
- DBS PayLah!: The maximum is based on your PayLah! daily transfer limit, up to $2,000 for DBS/POSB digibank users.
- OCBC Digital: The daily transaction limit is $5,000.
- Credit Cards: Maximum payment amount is your credit limit or up to a limit of $20,000.
- Debit Cards: Maximum is either your bank account balance or your daily transaction limit sets up by you or up to a limit of $20,000.
- Credit Card Instalment Plan: Maximum payment amount is up to $20,000.
- Pay with Loans: Maximum payment amount is up to $20,000.
- Pay + Earn: Maximum payment amount is up to $19,000.
- Pay Any Bills: Maximum payment amount is up to $9,000.
46.
Can I make partial payment for my bills, Condo/Bldg, Home Services, Student Services and Pay Any Bills (not applicable for Fines, Top-up and LTA e-Day Licence)?
Yes, you may choose to make partial payment for your bills, Condo/Bldg, Home Services, Student Services and Pay Any Bills as long as it meets the minimum payment amount set by the respective billing organisations.
47.
Can I perform bills payment, fines payment, top-ups, eServices, Condo/Bldg, Home Services, Student Services and Pay Any Bills payment together in the same transaction?
Payment for bills, top-ups and eServices can be made in the same transaction.
Fines, Condo/Bldg, Student Services and Pay Any Bills payment has to be performed in separate transactions.
48.
What is the maximum number of bills, fines, top-up, eServices, condo/Bldg, Home Services, Student Services and Pay Any Bills I can pay or make in a single transaction?
Should you encounter any discrepancies, please contact AXS customer service at 6560 2727.
Operating Hours:
Weekdays: 8.30am – 8.30pm
Weekend/PH: 8.30am – 6pm
Please provide the following information to the customer service officer to facilitate your transaction inquiry.
- Transaction date and time
- Amount paid
- Billing organisation paid to
- Payment channel
49.
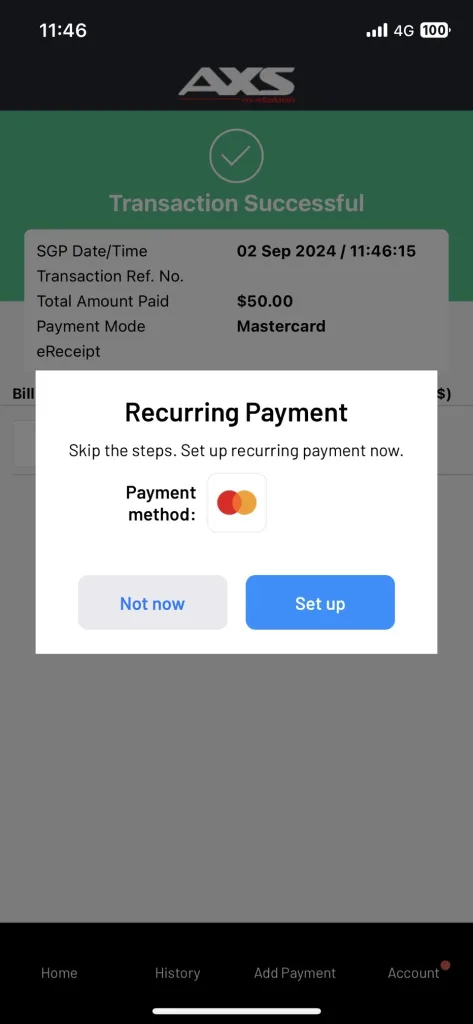
What is Recurring Payment?
Recurring Payment on AXS App helps organize and automate bill payments, giving you control and convenience when and how to pay.
50.
Where can I find Recurring Payment?
This service is available on AXS App, go “Account” and look for “Recurring Payment”.
51.
Who can I pay to?
You may pay to most billing organizations available on AXS App except for fines, top-ups and eServices.
52.
What are the payment modes accepted for Recurring Payment?
Mastercard and VISA is accepted as the payment mode for Recurring Payment. More payment options will be added gradually.
53.
How do I set up Recurring Payment with saved card?
- Option 1: Using a New Mastercard or VISA Credit/Debit Card
- Select Credit Cards or Debit Cards, then choose Other Banks (Mastercard/Visa).
- Enter your card details and check the option “Save this card as my saved card for future payments.”
- Proceed with bank authentication.
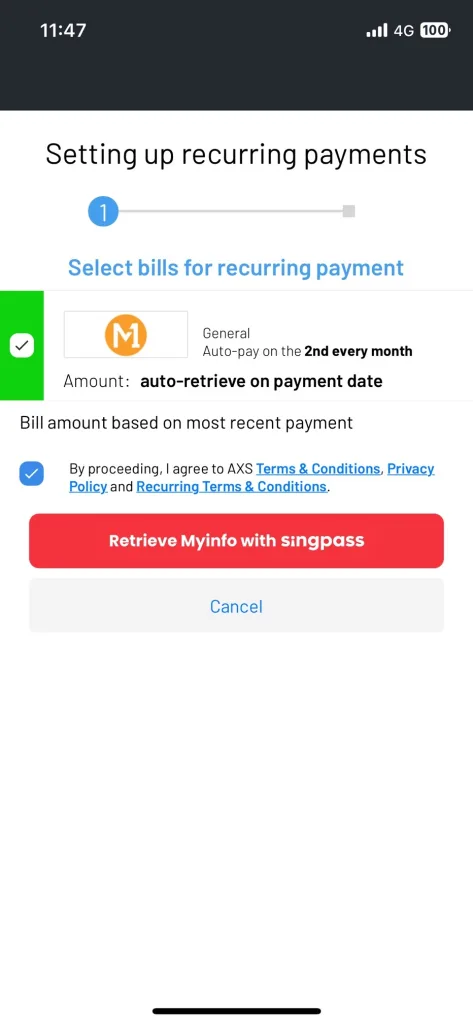
- At the Recurring Payment setup screen, select the bills to set up and proceed with your registered NRIC/FIN or retrieve your details with Singpass.
- Option 2: Using Saved Card
- Select any card under “Saved Card” during payment.
- Proceed with bank authentication.
- Select the bills to set up and proceed with your NRIC/FIN or retrieve details with Singpass.
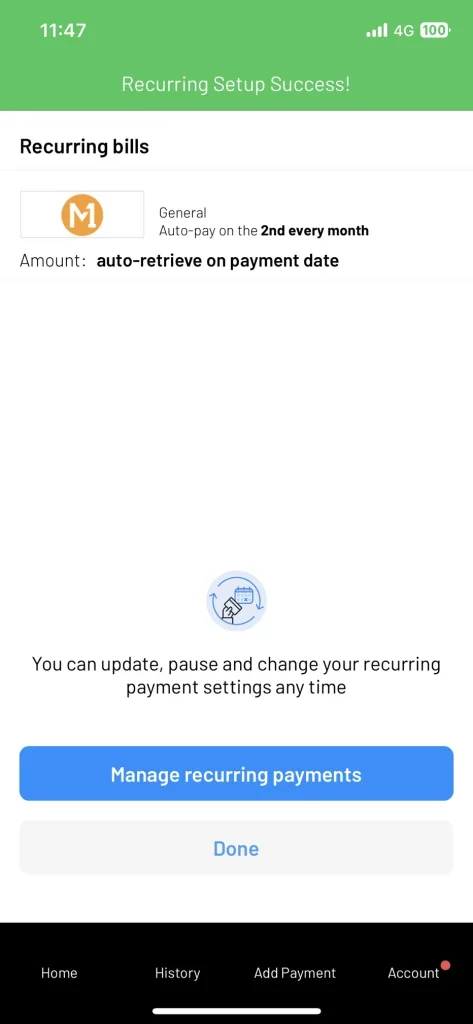
- After successful setup, your bills will be paid automatically on the scheduled date. Manage your recurring setup anytime under AXS m-Station > Recurring Payment.
54.
How is my NRIC/FIN used for Recurring Payment setup?
Your NRIC/FIN is the primary identifier for your Recurring Payment setup and is used to verify and retrieve Recurring Payment details for payment processing.
55.
Do I need to login with Singpass every time I add new bills to Recurring Payment?
After the first successful Recurring Payment setup with Singpass, you will only need to verify with your AXS App passcode or biometric login to add new bills to Recurring Payment.
56.
How do I make changes to the list of bills set up under Recurring Payment?
Go to AXS App > Recurring Payment to edit:
-
- Bills that are paid
- Recurring payment date
- Payment amount (where applicable)
57.
What happens to my Recurring Payment setup when I update to a different NRIC/FIN?
Your Recurring Payment setup is linked to your NRIC/FIN. If you update it, you will no longer be able to view or manage the recurring bills linked to the previous NRIC/FIN.
58.
Can I retrieve my existing Recurring Payment setup on a different mobile device?
Yes, you may log in with Singpass to retrieve your Recurring Payment setup.
59.
Will I be notified before Recurring Payment transaction is processed?
3 days before the Recurring Payment date, you will receive push notification and email. Please ensure notifications is allowed for AXS App min your mobile device settings and email address is entered under My Profile.
If you wish to pause this cycle of Recurring Payment, you may proceed to AXS App > Recurring Payment and turn-off your selected bill by 3.00pm the day before recurring payment date. You have the option to disable once or disable till you turn it back on.
60.
Will I be notified when a Recurring Payment transaction is successfully processed?
You will receive an eReceipt by email. Transaction status will also be reflected under History.
61.
What can I do if I discovered that I have setup Recurring Payment to a wrong bill?
You may delete the wrong bill arrangement in AXS App > Recurring Payment and set up a new recurring payment arrangement for the correct bill.
62.
How can I update the information of my bill set up under Recurring Payment?
You may go AXS App > Recurring Payment to edit recurring payment date and payment amount (where applicable).
63.
What happens if my payment card or payment option has insufficient fund on the Recurring Payment date?
Your Recurring Payment transaction will fail, you will receive a push notification and email to inform you of the unsuccessful transaction. Please make payment separately for the affected bills and ensure there is sufficient fund available on your payment card or payment option on the next Recurring Payment date.
64.
What happens if my payment card or payment option has expired or is terminated on the Recurring Payment date?
Your Recurring Payment transaction will fail, you will receive a push notification and email to inform you of the unsuccessful transaction. Please make payment separately for the affected bills.
To continue Recurring Payment for the affected bills, please delete the setup under your old payment card or payment option and set up a new Recurring Payment.
65.
How do I update my expired credit/debit card used for Recurring Payment?
When your credit/debit card is expiring, you will receive a push notification to update your card details. Please proceed to AXS App > Recurring Payment to enter your new card details and complete bank authentication.
66.
Can I request stop payment for a bill that has been processed and paid on Recurring Payment date?
Stop payment is only available before the bills are processed and updated to the respective billing organizations. Please contact AXS Hotline at +65 6560 2727 (operating hours: Weekdays: 8.30am – 8.30pm, Weekend/PH: 8.30am – 6pm) or email at cs@axs.com.sg for assistance.
67.
Why am I asked to renew my Recurring Payment setup?
You may be asked to renew your Recurring Payment authorization from time to time as required by the payment option providers. You will be notified via push notification and email, please proceed to AXS App > Recurring Payment to complete renewal process.
68.
When happens to my Recurring Payment setup when I update my profile to a different NRIC/FIN?
Your Recurring Payment setup is linked to your NRIC/FIN, when you update to a different NRIC/FIN you will no longer be able to view or manage the list of recurring bills linked to the previous NRIC/FIN.
69.
What is Stop Payment?
Stop Payment on AXS app allows you the option to stop payment processing for completed transaction(s). A service fee of $5.00 is applicable for each Stop Payment request. You will need to sign-up with AXS Receive to use Stop Payment. Find out more about AXS Receive.
70.
Where can I find Stop Payment?
You can find it under History; Stop Payment button will appear for transaction(s) eligible to stop.
71.
How will I receive my refund for the transaction that has been stopped?
Refunds will be processed and credited to you through AXS Receive within 5 working days. Find out more about AXS Receive.
72.
Is there a time limit to request Stop Payment?
Yes, Stop Payment is only available before the selected bill(s) are processed and updated to the respective billing organization(s).
73.
Do I need to pay for Stop Payment request?
Yes, a $5.00 service fee is applicable for each Stop Payment request, regardless of the number of bill(s) in each Stop Payment request.
74.
Do I need to submit documents for Stop Payment?
No additional document submission is required for Stop Payment on AXS app. If you request Stop Payment through AXS customer service, documents submission will be required.
75.
Why is my transaction not available for Stop Payment?
It may be due to one of the following reasons:
- Your transaction amount is less than $6.00
- Your bill(s) has been processed and updated to the billing organization(s)
- You have made payment with a credit or debit card
76.
I only want to stop one of the bills in this transaction, will my other bills be stopped too?
When you select Stop Payment, you will be able to select the bill(s) you wish to stop payment processing for.
77.
I have completed Stop Payment request for a bill earlier, can I request Stop Payment for another bill in the same transaction?
Yes, you may request Stop Payment for another bill in the same transaction if the bill has not been processed and updated to the billing organization. A $5.00 service fee will be applicable for this new Stop Payment request.
78.
What can I do if I want to request Stop Payment but my transaction is not eligible?
You may contact AXS customer service at 6560 2727 for assistance.
Operating Hours:
Weekdays: 8.30am – 8.30pm
Weekend/PH: 8.30am – 6pm
79.
What can I do if I want to request Stop Payment but I have exceeded the 24 hours’ time limit?
You would not be able to request Stop Payment, however you may contact AXS customer service at 6560 2727 or the respective billing organization for assistance.
80.
What can I do if I want to request Stop Payment but I do not want to sign-up for AXS Receive?
You would not be able to request Stop Payment on AXS app. Please contact AXS customer service at 6560 2727 for assistance.
81.
Can I cancel the completed Stop Payment request?
Once Stop Payment request is completed, you will not be able to cancel it. You may make a new bill payment.
82.
Why save a payment card?
Making payment with a saved card is more and secure as you would not need to enter your card information during payment. This also enables you to complete your transaction faster and more conveniently.
-
- The following criteria must be met for your card to be saved:
- The card must be a Mastercard or Visa, and
- A passcode must be set up in AXS app.
83.
What is the number of cards I can save?
You can save a maximum of 6 debit or credit cards.
84.
How will my card be saved in this app?
After entering your card information, a unique account number will be generated for this saved card. Future payments will be made using this unique account number, instead of your card information.
85.
Is it secure to have my cards saved in this app?
Only the unique account number generated for each saved card is stored in the app, and it is encrypted using the app passcode. This unique account number is valid only within the AXS app.
86.
Can I delete my saved cards?
Yes, you can delete saved cards at any time. Simply select the debit or credit card you wish to remove and select “Delete Card” at the bottom of the screen.
87.
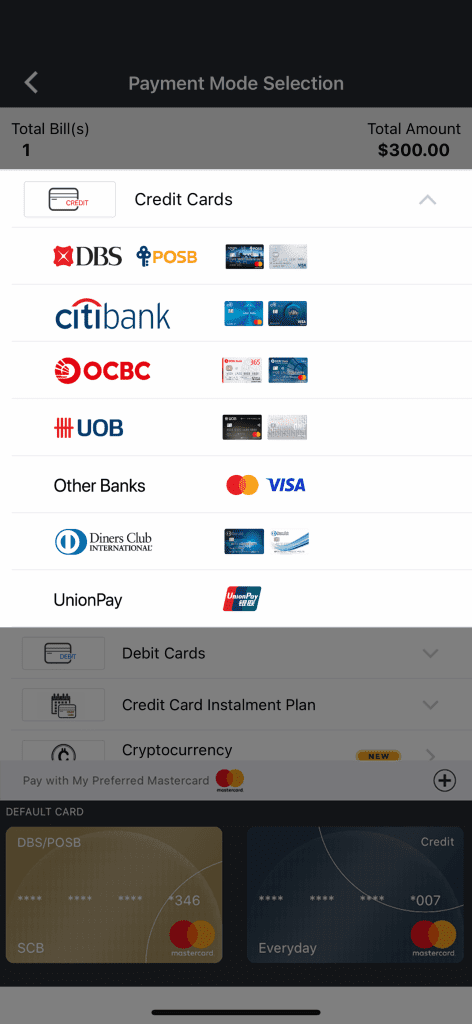
How do I pay using my saved card?
At the payment mode selection screen, select your preferred saved card for payment. You will be prompted to enter a One-Time Password (OTP) sent to your credit card bank registered mobile phone number to complete payment.
88.
If my saved card has been replaced and the card information (e.g. credit card number, expiry date, security code) differs from the saved card, can I edit the information on this saved card?
No, you cannot edit the information of a saved card. Each saved card has its own unique account number for security reasons. If you card is replaced, you will need to delete the current saved card and add the new replacement card.
89.
What is AXS Receive?
AXS Receive is a free service that allows registered users to consolidate, track, and receive money and information from participating corporate organizations.
This service is open to all Singaporeans and Singapore Permanent Residents with a bank account registered with PayNow (NRIC-linked).
90.
Is there a fee for using this service?
No, AXS Receive is free to use.
91.
How do I sign up for AXS Receive?
Go to AXS app and select “Receive” under “Account” to register.
Requirements:
-
- Sign in to Myinfo using Singpass (for authentication and to receive your Name, NRIC number, Contact number, and Vehicle number, if any).
- A bank account registered with PayNow using your NRIC number.
92.
What are the benefits of signing up with AXS Receive?
With AXS Receive of sign-up, you will
- enjoy the convenience of hassle-free receipt of payments and information from corporate organizations,
- have a peace of mind of knowing that the payments will be credited into your bank account registered with PayNow using NRIC number and this information is not shared with any third parties, and
- be in the know when there is a payment due to you through push notification (needs to be allowed for AXS app) and email.
93.
How many NRIC numbers can I register for AXS Receive?
You can only register one NRIC number per mobile device.
94.
What happens if I register the same NRIC number on another mobile device for AXS Receive?
The AXS Receive registration on the old mobile device will be deleted and the AXS Receive profile on the new mobile device will be activated.
95.
Can I request a refund from a transaction made on AXS app through AXS Receive?
You may request Stop Payment and refund for eligible transaction(s) made on AXS app. Find out more about Stop Payment.
96.
How do I know if there is a payment made to me?
You will receive push notifications and emails via the AXS app. Ensure push notifications are enabled for the AXS app.
97.
How long will it take for me to receive a payment?
It will take about 5 working days upon receiving instructions from the business organizations.
98.
How does AXS safeguard my data security?
Your details are verified through Singpass Myinfo and PayNow.
Your information is encrypted and stored securely on your mobile device and in AXS databases.
99.
Can I de-register/delete my AXS Receive profile?
- Yes, you can delete your AXS Receive profile at any time.
- If you delete your profile after receiving a payment notification, the payment will still be credited to your PayNow-linked bank account.
- To delete your profile, go to “Account” > “AXS Receive” > Delete AXS Receive information.
100.
Can I stop a payment after I have been notified?
No, payments cannot be stopped once processing has begun
101.
Can I request a refund for a transaction made on AXS app through AXS Receive?
You may request a Stop Payment and refund for eligible transactions.
Find out more about Stop Payment via the AXS app.
102.
How do I update my NRIC number for PayNow on AXS Receive?
- Update your NRIC for PayNow via your internet/mobile banking.
- Once updated, contact AXS Customer Service for assistance with linking your new NRIC to AXS Receive.
103.
Will I still receive payments if I uninstall the AXS app?
Yes, if you uninstall the AXS app after receiving a payment notification, the payment will still be credited into your PayNow-linked bank account (NRIC).
104.
Will I be informed of failed payment credit if I have deregistered my NRIC number for PayNow recently? How do I update my NRIC number for PayNow on AXS Receive?
Yes, if a payment credit fails, you will receive a push notification and email.
To resolve the issue:
- Ensure your NRIC is set up correctly for PayNow via your internet/mobile banking.
- After setup, contact AXS Customer Service at 6560 2727 for assistance.
- Operating Hours:
- Weekdays:8.30am – 8.30pm
- Weekends/PH:8.30am – 6pm
105.
What is Marketplace?
Marketplace is a space where you will find value-added services and good deals, which you can discover, buy and apply, anytime you want.
106.
What services are/will be available in Marketplace?
The following services are now available on Marketplace:
- HL Assurance
- AXS Selection – apply for Credit Cards, Loans/Accounts, Insurance and Other Services
- Remittance (Aleta Planet, Instarem)
- Vouchers & Deals
We are looking into introducing more services in the upcoming version releases.
107.
What is Aleta Planet remittance service?
This is a remittance service provided by Aleta Planet, allowing AXS App users to send money securely to China through UnionPay International, Alipay and WeChat pay. Aleta Planet MES Pte Ltd is licensed and regulated in Singapore by the Monetary Authority of Singapore (MAS).
108.
Is there a limit on the remittance amount?
The minimum amount is S$1.00, and the maximum amount is S$3,000.00.
109.
How much is the transfer fee?
Standard transfer fee ranges from S$12 to S$30. Promotional transfer fee may apply from time to time, stay informed by checking Marketplace in AXS App (Marketplace > Remittance > Aleta Planet).
110.
What payment mode is accepted?
UnionPay International, Alipay and WeChat pay is the current accepted payment mode.
111.
How long does it take for a UnionPay transfer to reach the recipient?
For remittance done between 7:00am to 11:00pm, the recipient should receive the fund immediately. For remittance done between 11:00pm to 7:00am, the recipient should expect the fund after 7:00am.
112.
Which China banks are eligible to receive UnionPay International remittance transfers?
All mainland China bank cards with UnionPay logo are supported to receive UnionPay International remittance transfers. Please ensure the recipient has enabled individual overseas remittance services before proceeding with the transfer.
113.
How long does it take for the transfer to reach the recipient via Alipay/ Wechat?
- To receive money on Alipay or WeChat, the recipient must be a Chinese citizen, registered with a Mainland China Resident ID card.
- Remittance transfer to Alipay should arrive almost immediately.
- Remittance transfer to WeChat may take up to 24 hours subjectd to WeChat verification, recipient bank card or e-wallet registration.
114.
What should I do if I encountered issue with my remittance transfer?
Please go to Marketplace > Remittance > Aleta Planet > Remittance History to confirm transfer status.
- If status is pending, please wait for 15 minutes and check status again.
- If status is unsuccessful and money has been deducted from your bank account, please contact AXS Hotline at +65 6560 2727 (operating hours: Weekdays: 8.30am – 8.30pm, Weekend/PH: 8.30am – 6pm) or email at cs@axs.com.sg for refund.
115.
What is Wandr-E remittance service?
Wandr-E, a brand of Wandr Pte Ltd and a licensed major payments institution regulated by the Monetary Authority of Singapore (MAS), offers a simple, affordable, and accessible platform to transfer funds globally at competitive exchange rates.
116.
What do I need to register for Wandr-E remittance service?
You can quickly register for a Wandr-E account and confirm your identity immediately using Singpass Myinfo if all the necessary information is provided.
117.
Which countries can I transfer funds to?
You can transfer funds to the following countries:
Asia: Hong Kong, India, Indonesia, Japan, Malaysia, Philippines, South Korea, Sri Lanka, Thailand, Vietnam
Oceania: Australia, New Zealand
118.
Is there a limit on the remittance amount?
The minimum amount is S$5.00, and the maximum amount is S$25,000.00 per transaction.
119.
How much is the transfer fee?
Wandr-E transactions are free. However, a cost-covering fee may be applied in some cases. There are no additional or hidden fees; all fees will be disclosed upfront.
120.
What payment mode is accepted?
We accept PayNow and Bank Transfer, please include your settlement number as the payment reference.
121.
How long does it take for a transfer to reach the recipient?
There are a number of delivery service options, such as bank account transfers, cash collection, and bill payment. The availability of these services varies depending on the country of destination.
The fund transfer process will commence once Wandr-E receives the payment before the cut-off period (if applicable) and that there are no delays from any parties involved.
For bank transfer to the following countries, delivery of funds will be available within 5 minutes: Hong Kong, India, Indonesia, South Korea, Philippines, and Thailand. For other countries it will be within 1 to 2 business days.
122.
What should I do if I encountered issue with my remittance transfer?
Please go to Marketplace > Remittance > Remittance History to confirm transfer status.
- If status is pending, please wait for 15 minutes and check status again.
- If status is unsuccessful and money has been deducted from your bank account, please contact AXS Hotline at +65 6560 2727 (operating hours: Weekdays: 8.30am – 8.30pm, Weekend/PH: 8.30am – 6pm) or email at cs@axs.com.sg for assistance.
For full FAQ, please visit Wandr-E website.
123.
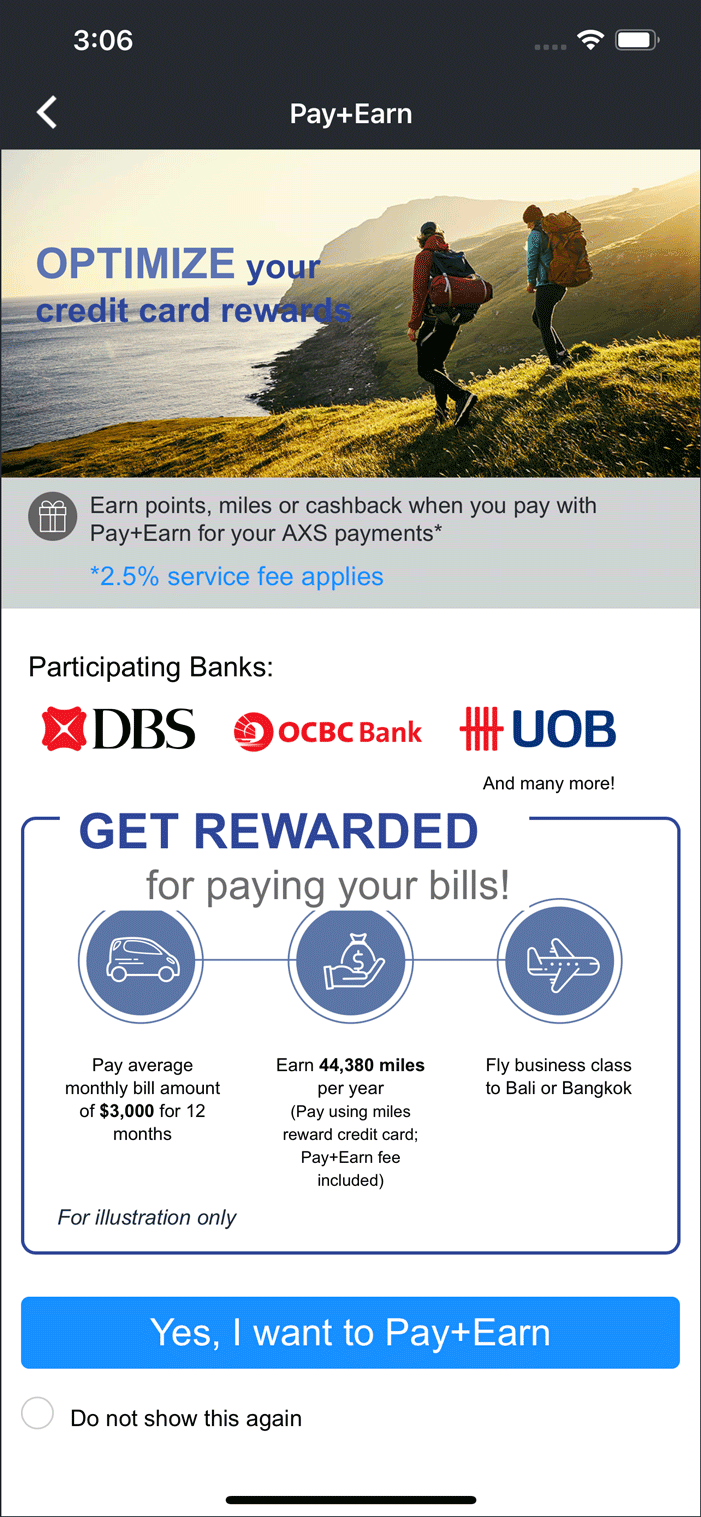
What is Pay+Earn?
Pay+Earn is a payment option available on AXS app which enables you to earn credit card points, miles or cashback* for every successful bill payment transaction when you use your preferred card.
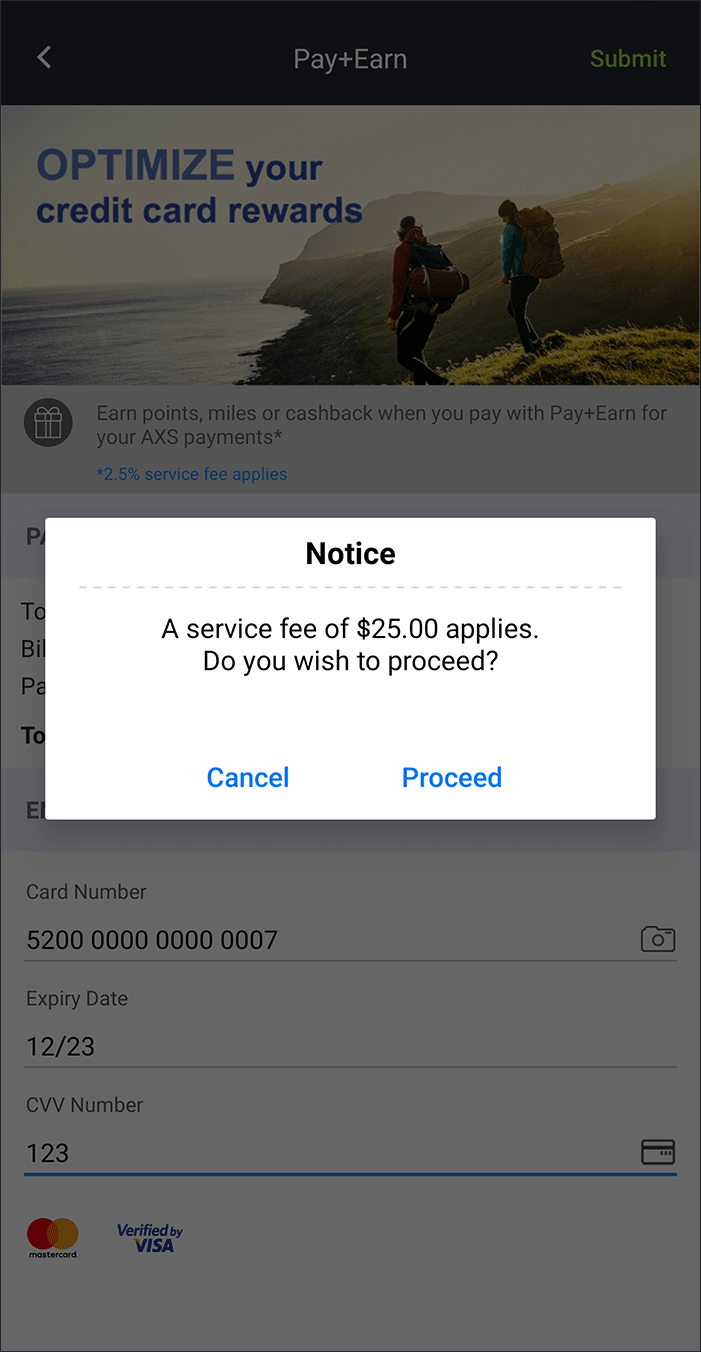
Please note a fee of 2.5% of the total payment amount is chargeable upfront. In the event that the user requested for a refund of transaction amount due to his/her negligence, this Pay+Earn fee will not be refunded.
*Card issuing banks reserve the right to update eligible transactions for rewards issuance from time to time. AXS makes no warranties on points rewarded by banks, cardholders should check with card issuing bank for details.
124.
What is required to use Pay+Earn?
You will need to have a valid Singapore-issued credit card (Mastercard/Visa), excluding Citibank and HSBC cards.
125.
What can I pay with Pay+Earn?
You can make payments to all services on AXS app except Credit Cards and Loans.
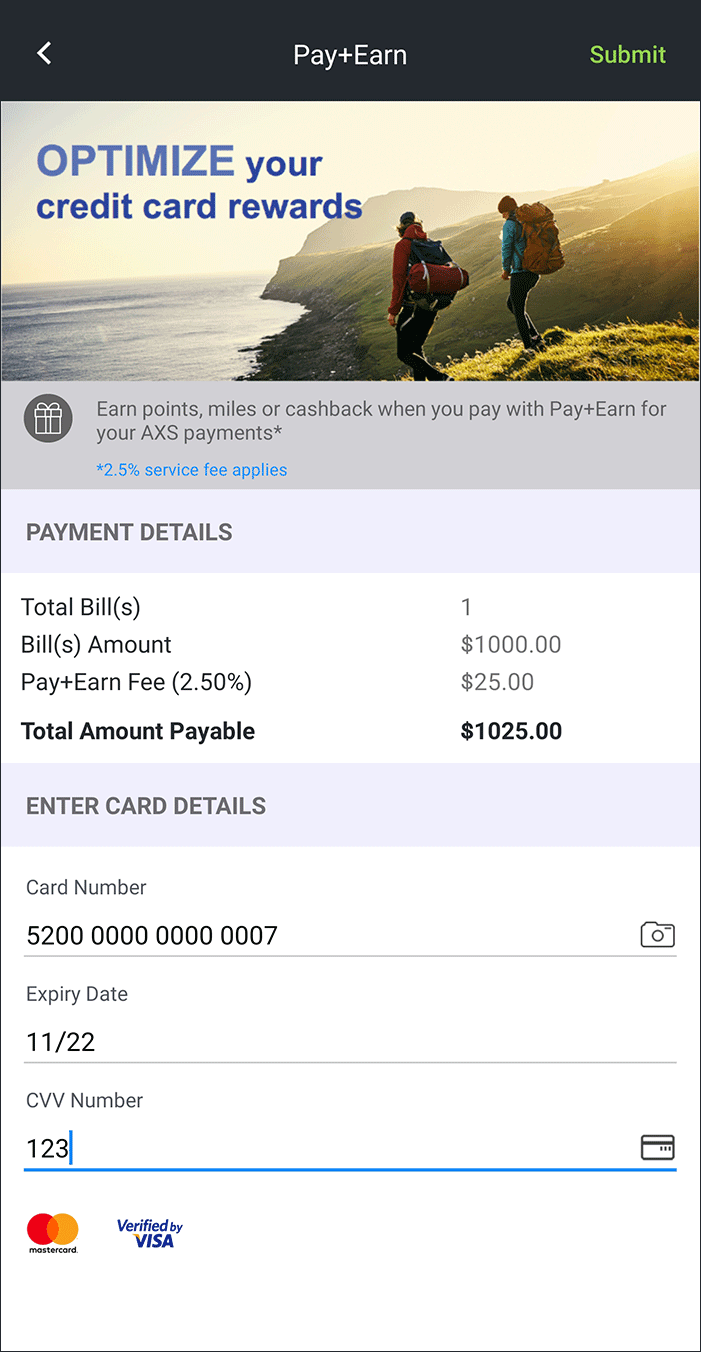
126.
How do Pay+Earn works?
Using Pay+Earn is simple.
- Add your bill(s) on AXS app
- Select “Pay+Earn” at the payment mode selection screen.
- Enter your credit card details when requested.
- Complete the transaction as per normal credit card transaction.
- Your rewards will be credited by your card-issuing Bank in your next credit card billing cycle (or as determined by your Bank)*.
* the rewards earned is as per your credit card rewards programme.
127.
Can I use any credit card for Pay+Earn?
Yes, any Singapore issued credit card (Mastercard/Visa) is accepted, excluding Citibank and HSBC cards.
128.
Do I earn rewards from the Pay+Earn fee?
Yes, the Pay+Earn fee will also be eligible for rewards computation.
129.
How much points, miles or cashback will I earn?
The amount of points, miles or cashback you earn is based on the credit card you used to make the bill payment. Please check with your card-issuing bank on the rewards detail.
130.
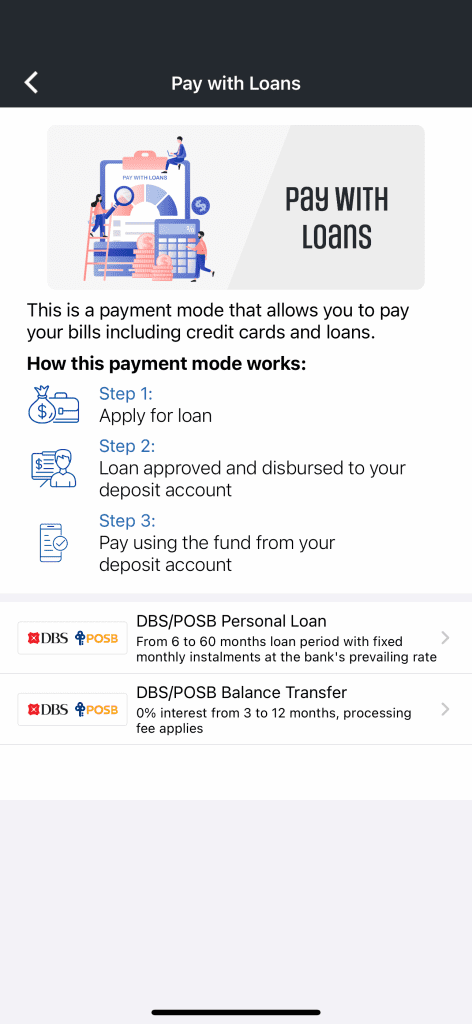
What is Pay with Loans?
This is a payment mode that allow users to apply for loan(s) offered by the Bank(s) and to use the approved loan fund to make payment on AXS app.
131.
Which AXS channel is Pay with Loans available on?
Pay with Loans is currently available on AXS app and will be available on AXS web soon.
132.
What are the services I can pay for with Pay with Loans?
You may pay for any services with Pay with Loans (if this payment mode is available).
133.
What are the loan products that is available under Pay with Loans?
For the initial launch, DBS/POSB Personal Loan and DBS/POSB Balance Transfer are available. More loan products may be added in the future.
134.
Is there any eligibility requirement to use Pay with Loans?
Eligibility is dependent on the requirements set out by the Bank for their individual loan product.
DBS/POSB Personal Loan
If you are a Singaporean, you are eligible without loan tenure restriction.
If you are a Foreigner, you are eligible but the loan tenure will be restricted to 12 or 24 months only.
DBS/POSB Balance Transfer
Everyone is eligible without loan tenure restriction.
135.
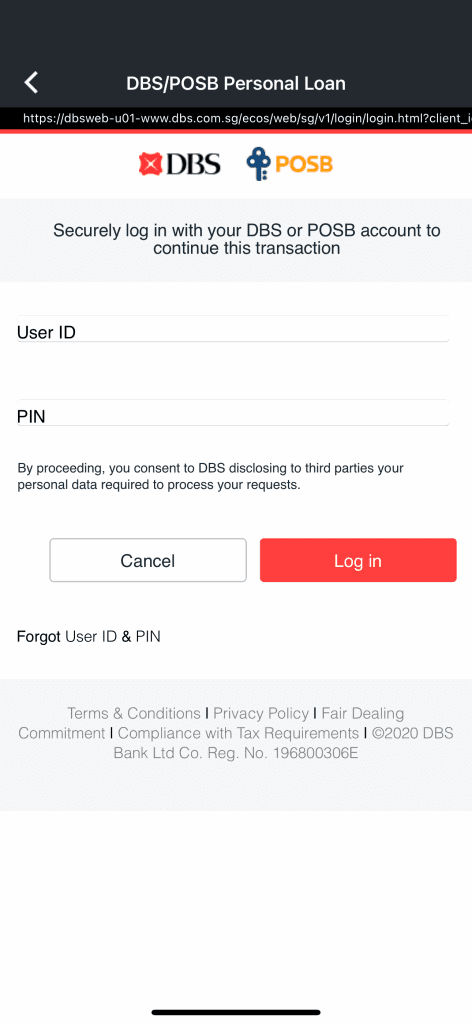
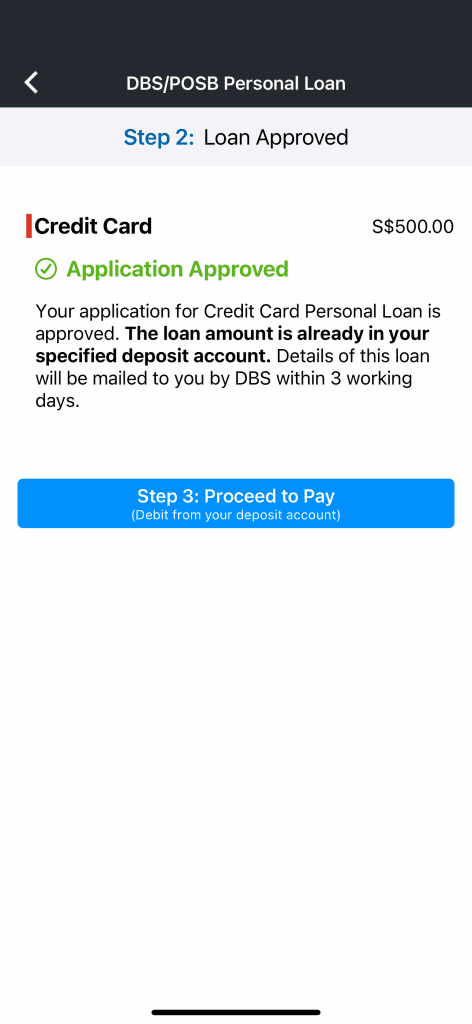
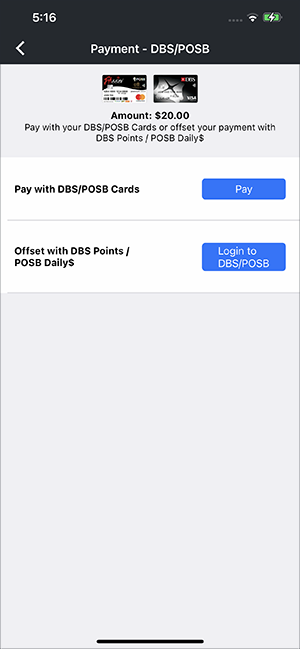
How do I pay with DBS/POSB Personal Loan / Balance Transfer on AXS app?
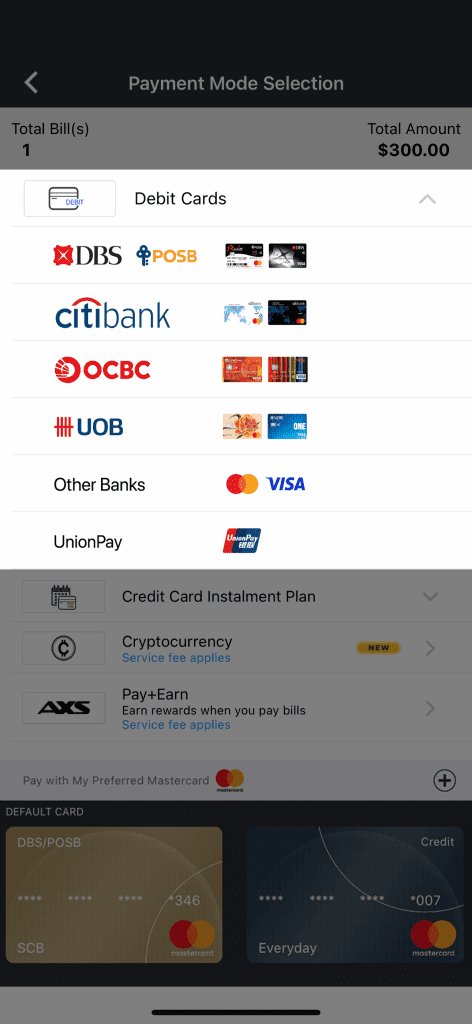
At payment mode selection page,
- Select Pay with Loans.
- Select DBS/POSB Personal Loan / Balance Transfer.
- Login to DBS/POSB using your Digibank User ID and PIN and complete the 2FA (two-factor authentication).
- Upon successful DBS/POSB 2FA login, you will be redirected back to AXS app to complete the loan application.
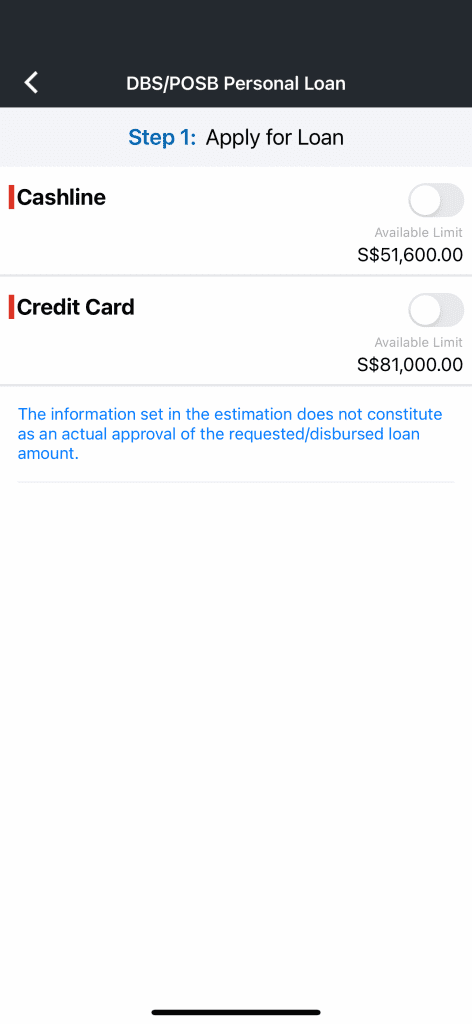
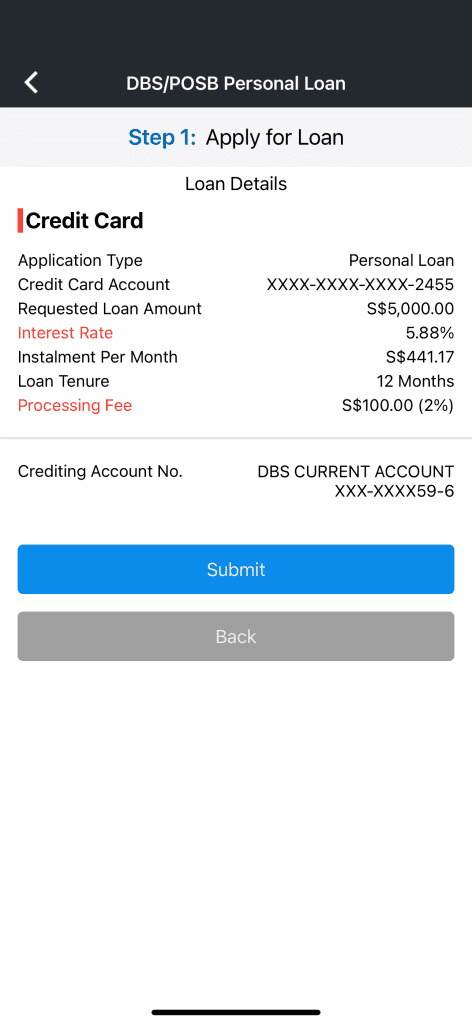
- Fill up the loan application form and submit. Your loan application status will be shown in seconds.
- If your loan is approved,
-
- The approved loan amount will be disbursed into your Current Account or Savings Account, as per the deposit account you have selected during the loan application.
- You will be prompted to proceed to make payment. Select Proceed to Pay. The bill payment amount will be deducted from your deposit account. DBS may require you to complete another two-factor authentication, depending on the payment amount.
136.
What if my loan application is not approved?
If your loan application is not approved, please choose another payment mode to complete your payment.
137.
What if my loan application is approved but the payment is unsuccessful?
If your loan application is approved but the payment is unsuccessful, the approved loan amount will remain in your deposit account and no deduction will be made. Please select another payment mode to complete your payment.
138.
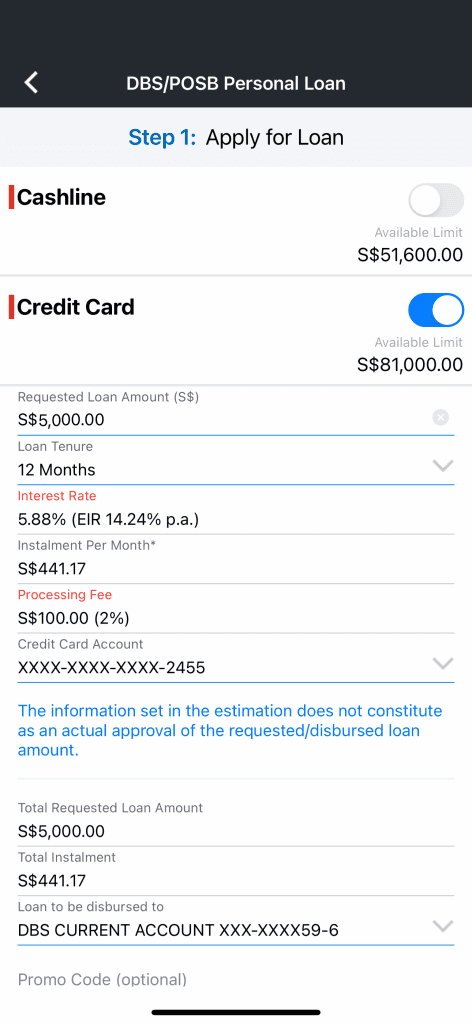
What is the loan amount I can apply for?
The loan amount you can apply for differs for each loan product.
DBS/POSB Personal Loan/ Balance Transfer
Minimum loan amount = S$500
Maximum loan amount = your eligible credit limit or S$199,900, whichever is lower
(loan amount must be in multiples of S$100)
139.
Is Pay with Loans available on AXS app 24 hours daily?
Pay with Loans is available from 8am to 11:30pm daily except for the last day of the month, which is available from 8am to 8:30pm.
140.
What is Pay Any Bills?
This service on AXS app allows you to make payment to any corporate organization for goods and services using their UEN or rental payments using UEN or NRIC/FIN. A service fee of 2.6% is applicable for each transaction, promotional service fee rate may apply from time to time. This service is provided and processed by Singapore E-Business Pte Ltd (SGeBIZ).
141.
Who can I pay to?
You may make payment to any corporate organization using their UEN, or rental payments using UEN or NRIC/FIN.
142.
How long does it take to complete payment transfer to recipient?
A processing time of 5 working days is required to complete payment.
143.
Is there any minimum and maximum amount limit for Pay Any Bills?
The minimum payment amount is $300.00 and maximum payment amount is $9999.99.
144.
What is the payment mode accepted for Pay Any Bills?
You may complete payment with Mastercard and Visa credit card issued in Singapore, excluding Citibank and HSBC cards.
145.
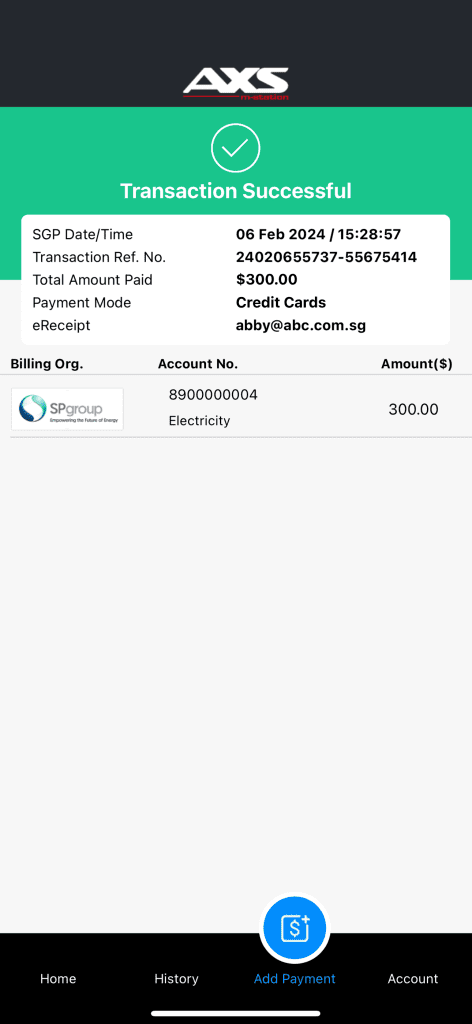
Will I get any confirmation that payment is completed?
Once the payment transaction is completed successfully, an eReceipt will be emailed to you and a payment notification will be emailed to the recipient email address entered during the transaction.
146.
Will the recipient receive any notification that there is an incoming payment?
A payment notification will be emailed to the recipient email address entered during the transaction.
147.
What happens when the payment to recipient fails?
If the payment to recipient using UEN or NRIC/FIN failed, we will refund the total payment amount inclusive of service fee back to your Mastercard/Visa card used to complete payment.
148.
After completing payment successfully, I realized that I have made a wrong payment, what can I do?
You may request stop payment and refund within 24 hours after you have completed payment, please note a stop payment service fee of $5.00 applies. To request stop payment, please contact AXS customer service at 6560 2727 for assistance.
Operating Hours:
- Weekdays: 8.30am – 8.30pm
- Weekend/PH: 8.30am – 6pm
149.
I only realize that I have made a wrong payment more than 24 hours after I completed payment, what can I do?
You are unable to request stop payment as your payment is processed for transfer to the recipient UEN or NRIC/FIN.
If the recipient UEN or NRIC/FIN is not valid, the payment will be rejected and refunded back to your Mastercard/Visa card.
If the recipient UEN or NRIC/FIN is valid, you will need to contact the recipient or your card issuing bank for refund assistance.
150.
What is My Vault?
My Vault is a data storage feature available on AXS app which lets you store information and digital documents such as insurance policies, statements, warranties, subscriptions and more. All information stored will be saved in your local device memory, the data are not shared with AXS.
151.
What is required to use My Vault?
You will need to enable passcode to use My Vault.
152.
What are the benefits of My Vault?
You can access stored data and documents in one place within AXS app.
153.
How to use My Vault?
To start, go to “Account > My Vault” on AXS app, select the relevant folder and tap Add to start adding information and documents. Once information and documents are entered, tap Save to store information.
To add customized folder, select Add Folder and enter the folder name. You can now start adding information and documents in this new folder. Up to 3 customized folders may be added.
154.
Are my information and documents stored securely?
All saved information and documents are stored in your local device memory securely, the data are not shared with AXS.
155.
What happens to My Vault data when I reset or turn-off passcode?
My Vault information and documents will be deleted together with all payment information. AXS is unable to retrieve and restore My Vault data as it is stored in your local device memory and not shared with AXS.
156.
What happens to My Vault data when I delete and reinstall AXS app?
My Vault information and documents will be restored if you have selected to backup AXS app data to your selected cloud back-up service.
157.
Is there any file size limit to the digital document I can add to My Vault?
File size is limited to maximum 10 MB, and also subjected to your local device storage space.
158.
What are the acceptable file formats for the digital documents?
The acceptable file formats are all image file formats (eg. jpg, png) and PDF.